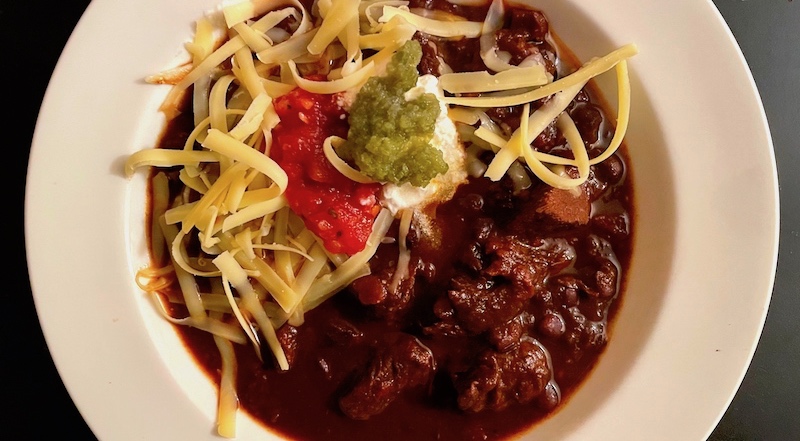
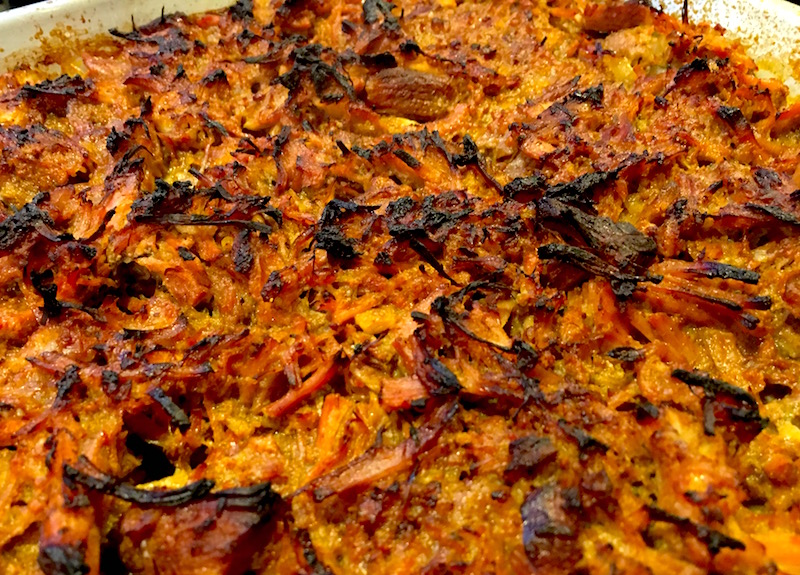
Epic Black Bean Chili Fit for a Crowd

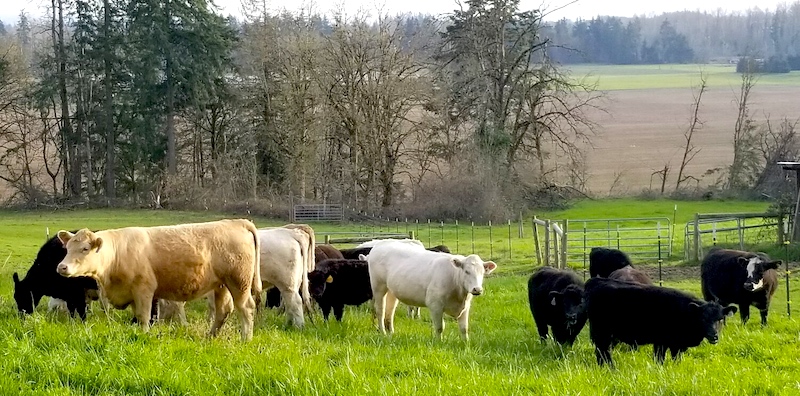
Oregon is so incredibly fortunate to have an abundance of pasture-based farms that are focused on animal welfare and the hard work of improving their soil.

There's Chris and Zack Menchini's Campfire Farms in Canby, Michael and Linda Guebert's Terra Farma in Corbett, Ryan Ramage and his family at Ramage Farms in Canby, Jared Gardner's Nehalem River Ranch at the coast, and in the snow-covered mountains and wheat fields of Eastern Oregon you'll find Cory Carman's Carman Ranch and Liza Jane McAlister, matriarch of 6 Ranch—whose tagline "Doing it the hard way since 1884" has this former ad person swooning—among dozens more. (Find where to get the products from local farms and ranches that have adopted pasture-based methods in the invaluable Oregon Pasture Network Guide.)

The artwork that Campfire Farms uses for its branding says it all!

If you follow any of these folks on social media or sign up for their newsletters like I have, you'll find that they'll occasionally post special offerings when they need to make room in their freezers or have extra stock (no pun intended) available. So when I run across a screaming deal on Carman Ranch ground beef or see that Campfire Farms is offering a box of assorted sausages and pasture-raised chicken breasts for a (relative) song, I jump on it.

That was the case when Ryan Ramage posted a photo of a box of beef chuck roasts and short ribs for close to half off the regular price. It did necessitate driving to Oregon City for a not-so-clandestine meetup at Tony's Smoke House and Cannery where Ryan was making a delivery, but he graciously plopped the box in the boot of the Subie and I handed him a check. Done!

A focus on soil improvement, carbon sequestration and animal welfare, like these pasture-raised, grassfed cattle at Ramage Farms, are hallmarks of pasture-based farms and ranches.

One of the chuck roasts was left out to thaw in a tub of cool water and I started the quest for a chili recipe that would assuage my craving for a chile-laced black bean version. Having belatedly stumbled across the amazing collection of videos and recipes of Pati Jinich, a superb cook and passionate activist for authentic Mexican culture and cuisine—watch her moving interview with Mayan women who formed a baseball team and are now national stars—I found a recipe for braised pork with chiles used as a filling to make pork chilorio burritas.

With apologies to Ms. Jinich, I substituted beef for the pork and added some of my roasted tomatoes and black beans to the ingredients. The result was magical. I hope you check out her videos and enjoy this bowl of delicious pastured beef and bean chili!

Epic Beef and Black Bean Chili

Adapted from a Pati Jinich recipe for pork chilorio burritas.

1 lb. dried black beans
3-4 lbs. pastured beef chuck roast, cut in 1" cubes
1 1/4 c. fresh-squeezed orange juice
1 1/4 c. water
1 tsp. kosher or sea salt
5 dried ancho chiles, tops and seeds removed
1 1/2 c. of the chile soaking liquid
1/2 c. onion, roughly chopped
4 cloves garlic
1 tsp. dried oregano
1/4 tsp. ground cumin
1/4 tsp. ground black pepper
2/3 c. cider vinegar
2 c. roasted tomatoes
3 Tbsp. vegetable oil
1/4 tsp. salt plus more to taste
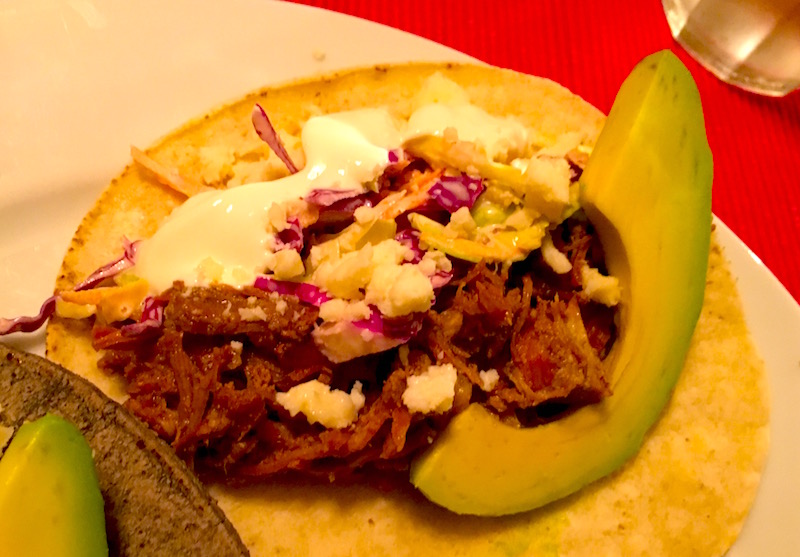
Condiments (optional): Grated cheddar or crumbled cotija, sliced avocados, shredded cabbage, sour cream (crema), sliced jalapeños, red pepper flakes, hot sauce(s)

The evening before serving, soak the beans by placing them in a large saucepan and cover with water by two inches. Put a lid on the pot and place on the counter or the back burner of the stove to soak (unheated) overnight.

At least three hours before serving, drain the beans and set aside.

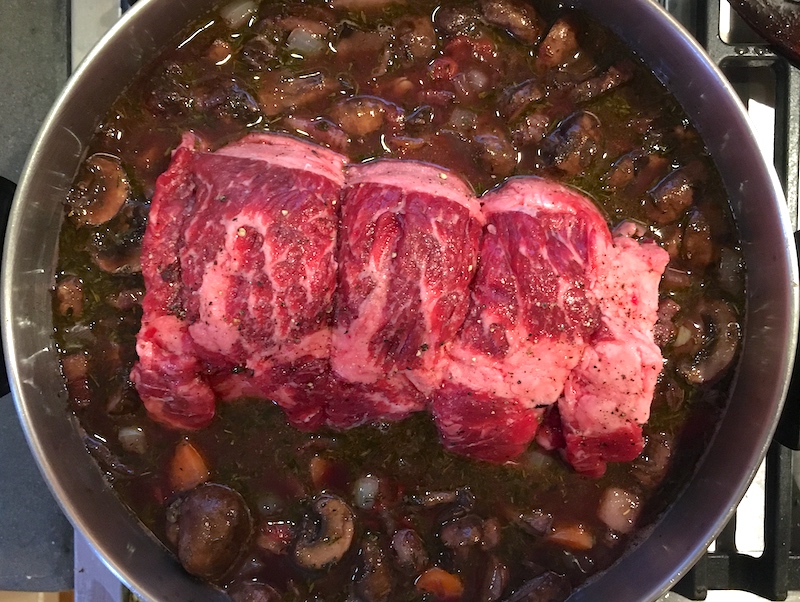
Place meat in a Dutch oven or large pot and pour orange juice and water over it. The liquid should barely cover the meat—if it does not, simply add more water. Add a teaspoon of salt and bring to a boil, then cover and turn down the heat to simmer for 60 to 90 minutes, until much of the liquid is gone. The meat should be cooked but still retain its shape. so once the meat is cooked, pour it into a large bowl and set aside.

While the meat cooks, remove the stems and seeds from the ancho chiles, tearing them into large pieces. (You may want to wear gloves for this step if you're sensitive to their oils.) Place the pieces of the chiles in a heatproof bowl and cover them with boiling water, letting them steep for about 30 minutes. Once the chiles have rehydrated and cooled, place them and 1 1/2 cups of their soaking liquid in the blender, adding the onion, garlic, parsley, oregano, cumin, black pepper, vinegar, and roasted tomatoes. Purée on high until smooth.

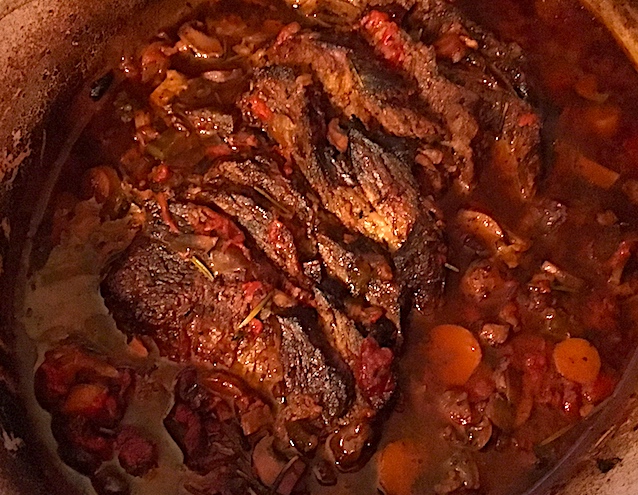
Take the pot that you cooked the meat in and heat the vegetable oil over medium heat. Pour in the blended chile sauce and simmer 4 to 5 minutes. Add the meat with its cooking liquid and the soaked, drained beans to the sauce in the pot. Add 1/4 teaspoon salt and let it cook, stirring occasionally, until the beans are tender but not mushy, 45 minutes to an hour. Taste for salt and add more if need be.

Serve as is or with a panoply of condiments as suggested above.


Read more about Terra FarmaCarman Ranch; and Nehalem River Ranch.

Stifatho or Stifado: However You Spell It, This Greek Beef Stew is F-A-B!

Call them stews or braises or, as New York Times food editor Sam Sifton termed this class of long-simmered, pot-cooked bellywarmers, "balms against winter’s bite," there's nothing in a cook's repertoire more satisfying on a cold night. Whether cooked on a stovetop or in the oven, the house starts to feel warmer almost immediately, and as the meat is browned and the vegetables are sautéed, the aromas begin to make stomachs growl in anticipation.

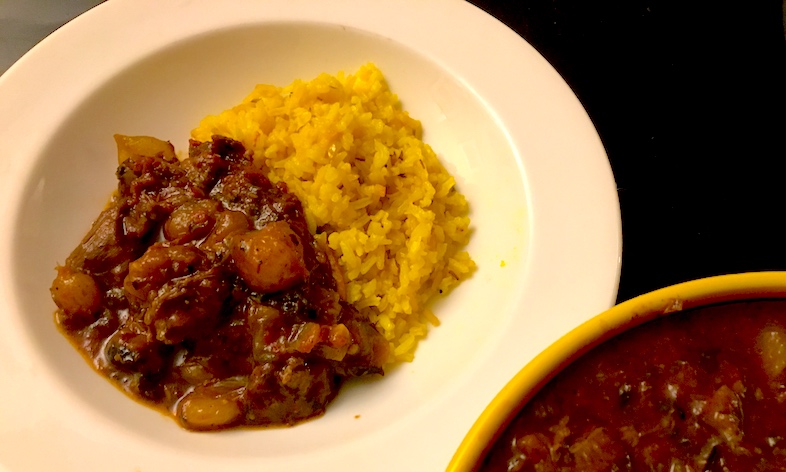
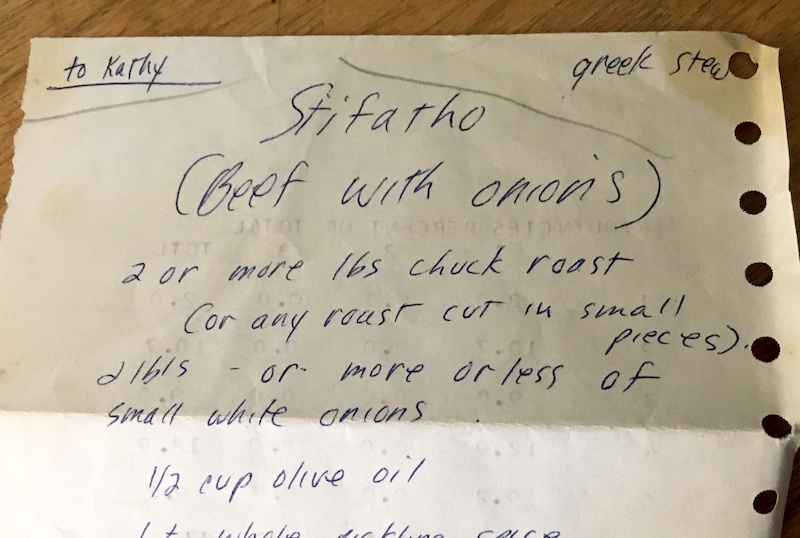
My first introduction to this particular stew was waaaaaaay back in high school when I became friends with a young woman who lived in our suburban neighborhood with its cookie-cutter ranch houses and striving white-collar families. Exotic in my stolidly middle-class experience, their house was littered with Balinese art and South Asian throws. Shelves of books rather than American colonial furniture were the focus of their decor, and when I was lucky enough to be invited for dinner they made curries and ethnic stews rather than noodle casseroles.

In other words, I was enthralled.

This all came back to me when friends—who've traveled extensively in Greece and are exotic in their own way—served us a Greek stew called stifatho that uses vinegar instead of wine or tomatoes to braise the meat, and calls for an equivalent weight of onions and beef. When I got home I dug through my trusty tin recipe box and found the original recipe from that family's home in high school—yes, I collected them even back then—and tinkered with it until it tasted just as I remembered.

Stifatho (Greek Beef Stew)

3 Tbsp. olive oil
3 lbs. beef chuck, cut in 1 1/2" cubes
1/2-1 c. flour
3 lbs. pearl onions (approx. 3 14-oz. packages frozen) or 3 large yellow onions, cut in 1/2" dice
2 c. canned or roasted tomatoes
1/2 c. red wine vinegar
5 cloves garlic, minced
1 Tbsp. oregano
3 bay leaves
1 Tbsp. fish sauce
1 stick cinnamon (optional)
2 Tbsp. brown sugar or to taste
Salt and pepper

Preheat oven to 350°.

Heat oil in large Dutch oven over medium-high heat.

Put flour in a 1 gallon zip-lock bag with a generous amount of salt and pepper and shake to combine. Add 8-10 cubes meat to the bag and shake to cover them with flour, working in batches to do all of the meat. You only want a dusting on each piece, so shake them off to make sure they're not clumped with flour.

Heat oil in a large Dutch oven. When oil is hot, add floured cubes to the pan, making sure not to crowd them. Brown them well on at least two sides. This will require several batches, so as they brown remove them to a plate or bowl. When all the cubes are browned, put them back in the Dutch oven and add onions, tomatoes, vinegar, garlic, oregano and bay leaves. Place in oven for 90 minutes.

Remove from oven. At this point you can either serve it later or finish seasoning the stew. If you're making it ahead you can cool it and either keep it in the refrigerator or transfer it to containers and freeze it. When you're ready to heat it for serving, thaw it or pull it out of the refrigerator and remove the fat that has solidified and proceed as below.

To finish the stew, stir in the fish sauce and cinnamon stick and heat on the stovetop. Taste, adding salt as needed, and when you can just detect the cinnamon flavor, remove the stick or it will dominate the stew. If it's overly vinegary for you, start adding brown sugar a tablespoon at a time, stirring it in and letting the stew sit for a few minutes before tasting again, since the vinegar flavor will get milder as it rests. The thing you want to avoid is a baked-bean sweetness, so add a splash of additional vinegar if that happens.

Serve with rice—I made my turmeric rice with tangerine peels and it was fantastic—polenta or roasted potatoes.

Pot Roast Bourguignon: Reward for an Early Spring Workout

First thing every morning I grab a cup of coffee that Dave brews early each morning and I take out our Corgi, Kitty, to, as my mother would have said, "stretch her legs." While she busies herself sniffing out the latest news from every tree and shrub, I look up at our ash trees to see if they're starting to build their furry leaf casings—a sure harbinger on our little lot—and I take a moment to note which canes of forsythia need clipping and whether the bleeding heart has emerged from under the leaf litter.

From this…

Early spring around here means yard work, with its requisite raking, trimming and moving of plants to new spots before they're smothered in shade by larger neighbors or spread beyond their assigned places in what we loosely call our "landscape." Attempting to tame their natural inclinations is better achieved in the cooler temperatures we're having now, before it warms up and they explode with growth and we'd rather laze about and sip cool drinks than labor in the yard.

…to this in four hours. So worth it!

Cool days and still-chilly nights not only hamper this spring explosion, but also provide a last opportunity to get out the braising pot before warmer days beg for grilling outside. The heavenly pot roast recipe below is super simple and can be assembled and put in the oven to simmer for a few hours while you're outside doing yardwork. Plus it provides an excuse to schedule breaks every hour or so to check and make sure the liquid hasn't all cooked away (add water if it seems low).

The smell when you come in the house for those "breaks" will give you motivation to get the outside work done quicker, too, the better to come inside and enjoy a cocktail while you make a salad and boil potatoes to serve alongside. And sitting down to a hearty and flavor-filled dinner that basically cooks itself? I can't think of a better reward for all that hard work!

Pot Roast Bourguignon

This is extremely easy to make, but you'll need to get it in the oven four hours before dinner or make it the day before. Cutting back on the time in the oven makes for a less than stellar, though still delicious, result.

4 slices bacon, cut in 1/4" pieces
1 3-5 lb. chuck roast
Salt and pepper
1 lg. onion, chopped in 1/2" dice
4 lg. cloves garlic, chopped roughly
4 med. carrots, sliced in 1/4" rounds
1 lb. mushrooms, sliced
1 tsp. thyme
3 large bay leaves
2 6" sprigs rosemary
1 qt. (32 oz.) roasted tomatoes
3-4 c. red wine

Preheat oven to 375 degrees.

Put bacon in a large braising pot that can go in the oven and fry till fat is rendered and it starts to brown. Add onions and garlic and sauté 2-3 min., then add carrots and sauté 2-3 min. Add sliced mushrooms and sauté till tender. Stir in tomatoes, bay leaves and herbs, then add wine. Sprinkle roast generously with salt and pepper and add to pot. Bring to a boil, then cover tightly and place the pot in the oven. (If the lid doesn't fit tightly, put a sheet of parchment paper over the pot, then place the lid on.) Roast for 2 hrs. Remove meat from pot and slice in 1/4" slices, then return the sliced meat to the pot, submerging slices in the sauce and vegetables. Replace cover and bake for another 1 1/2 hrs.

Craving Carnitas

I'd been jonesing for tacos for days, and just hadn't got around to making them. Then, fortuitously, some friends said they were going to be in the 'hood one evening, which gave me the perfect excuse to try a new method for making carnitas. (And yes, I'm one of those people who tries out new recipes on guests, much to the chagrin of my mother who considered it much too risky.)

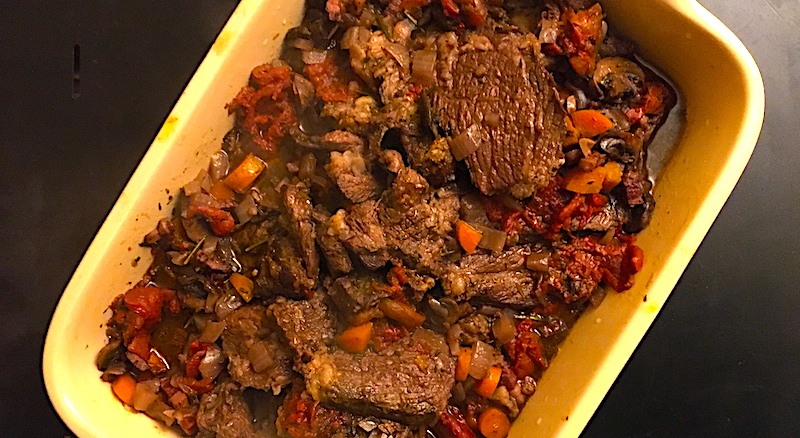
I'd already pulled a four-pound pork shoulder out of the freezer, it being a weekend and the perfect time for a nice slow braise on the stove. So I picked up some cotija cheese made by Albany's Ochoa's Queseria, cabbage for slaw, plus an avocado, salsa and tortillas. (I'm a huge fan of the organic tortillas from Three Sisters Nixtamal. It's a local company that makes masa using a traditional process called nixtamalization, where dried corn kernels are soaked in slaked lime, then ground and made into dough.)

Carnitas, which means "little meats," is made by simmering chunks of pork with citrus and spices for several hours until it's tender and on the verge of falling apart. I had some whey left over from making ricotta, so I decided to use it for the braising liquid, since the acids in the whey would help to break down and tenderize the meat. The method I used then calls for shredding the meat, roasting it in the oven (or in a cast iron pan on the grill) until any remaining liquid evaporates and the meat is crispy.

Warming the tortillas on a griddle is quick and easy, though I'm always tempted to pile them with heaps of fixin's, but exercising a teensy bit of restraint is worth the reward of the perfect bite, instead of bursting the taco or losing too much on your plate. Plus it means I can enjoy a few more of those longed-for tacos!

Carnitas

4 lbs. boneless pork shoulder
1 qt. whey, water or stock
1 onion, sliced in half lengthwise, then crosswise into 1/8” slices
8 cloves garlic
2 tsp. oregano
4 bay leaves
2 tsp. ground cumin
1 orange, quartered
1 Tbsp. kosher salt

Put all ingredients into large Dutch oven and bring to a boil. Reduce heat to simmer for 2-3 hours until meat is starting to fall apart and liquid is almost gone. If there is quite a bit of liquid left, remove the meat to a roasting pan, disposing of the orange peel and bay leaves. Bring the liquid in the pot to a boil and reduce until there is less than 1 cup remaining.

While liquid reduces, heat oven to 450°. When liquid has reduced, pour over meat in roasting pan and place in oven for 20-30 minutes or until it starts to brown. Shred any remaining large pieces.

Braising Weather: A Pot of Beans

It's officially fall. The ash trees surrounding our house are turning golden, coloring the light that spills in the kitchen windows. The leaves that have fallen are dry and crispy, crunching under the feet of the neighborhood children walking to school. The urge to kick through the drifts of leaves on the parking strip is almost impossible to resist, and I can hear that most autumnal of sounds as the kids (and sometimes their parents) succumb to their siren song.

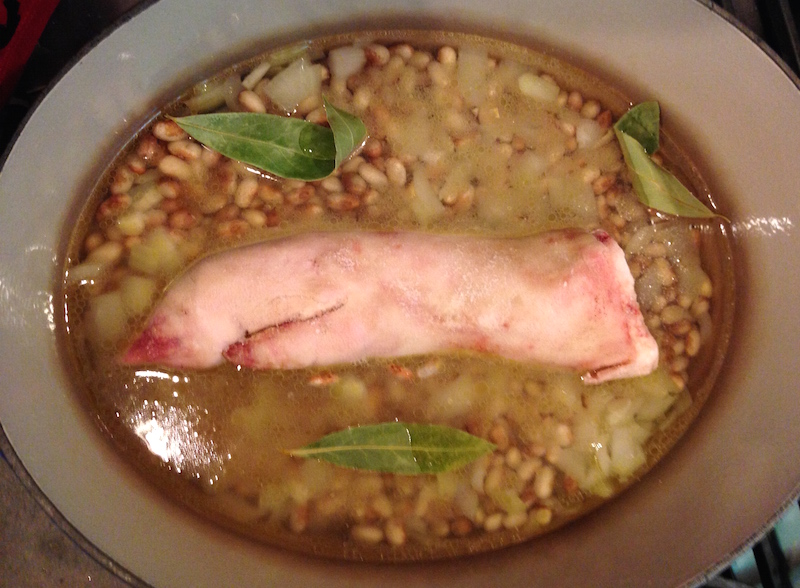
Nighttime temperatures are getting down into the 40s, requiring the addition of thick comforters to the beds, and mornings are brisk, with just enough of a chill to require pulling on a fleece jacket to walk the dogs first thing. The days warm up to the 70s by noon, and a glass of wine on the porch of an evening as the sun sets isn't out of the question just yet, warmth-wise.

This is what my parents used to call nigh-perfect Indian summer weather in the Northwest, though I'm beginning to think of it more and more as the onset of braising weather, time to pull out the Dutch oven for the season of low and slow-cooked meats and vegetables.

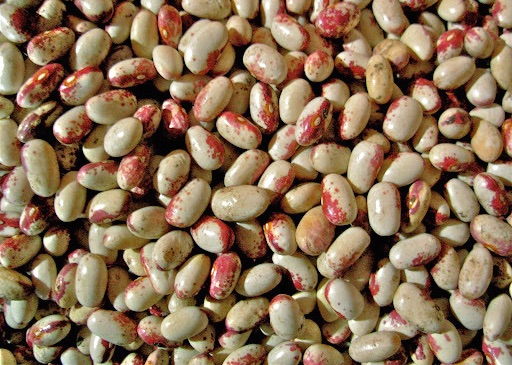
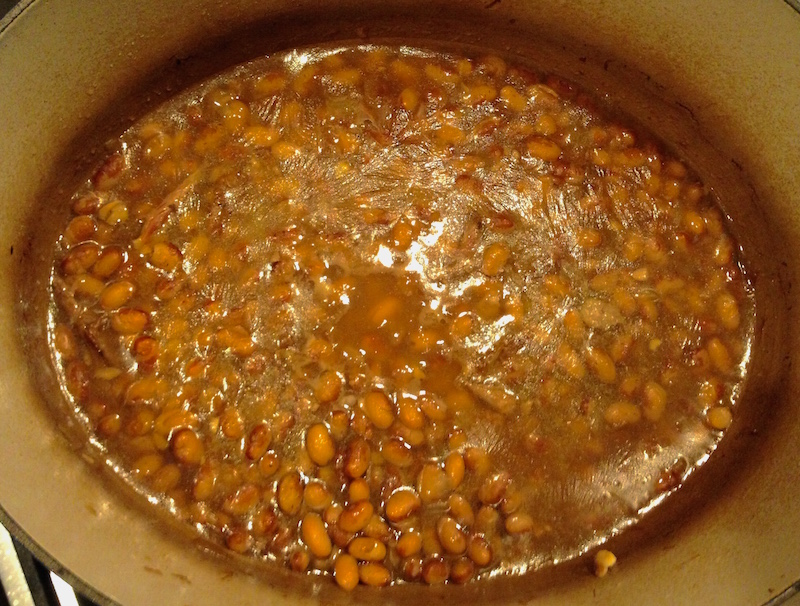
This year's crop of dried beans have begun showing up at the farmers' markets, and I was recently gifted some Rockwell beans from Willowood Farm on Washington's Whidbey Island. This variety was originally grown by an island pioneer, Elisha Rockwell, in the late 1800s, and it was brought back into production recently by farmer Georgie Smith when she took over the land her family had been farming on Ebey's Prairie since the 1890s.

Beans don't need much besides water, onions and garlic to make a mighty tasty main course, served with a hunk of hearty bread and maybe a drizzle of olive oil, but I happened to have a pig trotter (top photo) from the Square Peg Farm pig I'd butchered last winter. Beans and pork are a natural pairing, and the fattier the cut of pig the better. Trotters are almost all fat, and over several hours it gave a porky unctuousness to the pot. A half pound of bacon works well, too, and can be chopped or shredded before or after braising. Even a pound of pork shoulder will do its work on the beans, and can be shredded afterwards to make a beany, porky chili.

Regardless of how you decide to cook them, grab a few different kinds of beans from your local farmers' market and take them for a spin in a pot. I guarantee you'll find one (or more) you'll love, not to mention they'll warm up your family's bellies on these crisp fall nights.

Basic Braised Beans

1 lb. dried beans
3 Tbsp. olive oil
1 onion, chopped roughly
3 cloves garlic, chopped fine
Water
1 Tbsp. salt, plus more to taste

Optional:
3 bay leaves
Pork (pig trotter, 1/2 lb. bacon, 1 lb. pork shoulder)

Depending on the type of bean, you may need to soak them overnight in water (cover by 2"). Check with the farmer or follow directions if they're packaged. Drain and rinse prior to cooking.

Preheat oven to 300°.

On top of stove over medium heat, add oil to pot and heat until it shimmers. Add onion and sauté until tender, then add garlic, sautéing briefly until it's fragrant but not browned. Add drained beans and cover with fresh water by 1". Add salt and stir briefly. Add bay leaves and pork if using.

When it comes to a simmer, cover the pot and put it in the oven for at least four hours or until beans are tender and meat (if used) is falling apart. Check occasionally and add water to cover if the beans have absorbed it all (the amount of water needed will vary with the type of beans and if they have been presoaked). If meat has been used, remove it to a cutting board and chop or shred it, then add it back to the beans.

This can also be done on top of the stove. Simply keep the beans on a low simmer, covered, and check occasionally to make sure all the liquid hasn't absorbed.

More bean recipes: Baked Beans Italian Style, Backyard Barbecue Beans, Mexican-Style Black Bean and Greens Soup.