Guest Post: Corn and Beans

Josh Volk is the farmer at Cully Neighborhood Farm. This essay originally appeared on the farm's blog. You can read a profile of Josh and his work.

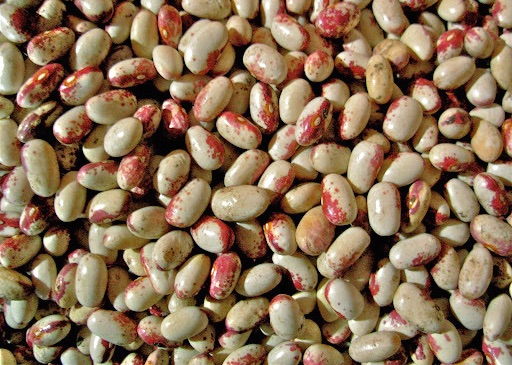
We grew out eight of our dry bean varieties this summer and between the good weather and giving them a head start by transplanting, for the first time we actually got them in earlier than ever. So I figured it was time to make a post with more description of each variety.

I’ll list them in order from left to right in the photo below. At the bottom of the post I’ll describe the two corn varieties that we grew with the beans (and have been growing for many years now).

Dry Beans

If you’ve only ever had canned beans, or bought dry beans from the bulk section, these are a completely different experience. They cook easily and evenly and have an extra layer of flavor. In general these all have delicate skins and cook well by soaking overnight, then bringing to a boil and gently simmering for as little as 20 minutes, although as they get older they’ll take a bit longer, maybe 45 minutes to an hour. Add salt and other seasoning to taste, generally about one to two teaspoons of salt per pound. Alternatively, I really like to use the residual heat from baking in my oven to cook the beans gently by putting them in a covered, heatproof container and baking them instead of cooking them on the stove top—same directions otherwise. Be sure to save the cooking liquid, which is delicious.

Nico Cannellini. This is the one bean I haven’t cooked with much! They were brought to me as a gift from a farmer in Tuscany a few years ago and I’ve been slowly increasing the amount I’ve been growing. This is the same farmer who I got the polenta corn from and I don’t know if there’s really a variety name, but I’ve just named the beans after his farm, Agricola Biologica Nico. On a side note, the Pescia and Piattella white beans we grow [see descriptions below] are also cannellini types, but each is distinct in size and shape, with subtle flavor differences.

Swedish Brown. I’ve been growing this bean for so long I don’t even remember where I got it or why. I’ve probably been growing it for 25 years now and I just really like the flavor. It’s a bit like a pinto bean, but so much more flavorful.

Piattella. I got this one from a grower in Italy who also uses corn for trellising. It’s a Slow Food Ark variety [link here] and you might try to find it from the Italian growers if you really like it and [in that way] support their efforts to keep it growing in its traditional areas.


If you’ve only ever had canned beans, or dry beans
from the bulk section, these are a completely different experience.


Yellow Forest (Giele Wâldbeantsje). This is another Slow Food Ark variety [link here]. It’s from the Netherlands and does pretty well here. Flavor wise it’s similar to the Swedish Brown beans but it’s much larger. As these beans age in storage their color changes from light yellow to a darker yellow, and there’s some variation even when they are newly dried.

Pescia (Sorana). A great little white bean, very tender and tasty. Lane Selman and I brought this back from Italy by request for Uprising Seeds in 2014 and they shared seeds from their first grow out with me the following year. I’ve been growing it since then and it’s a favorite for its great flavor and early drying on the vine. It’s a Slow Food Ark and Presidium variety under the name Sorana and you might try to find it from the Italian growers if you really like it and [in that way] support their efforts to keep it growing in its traditional areas. Uprising calls it Pescia, after the area where it is grown, as the Sorana name is protected and should only be used by growers in the protected area.

Tolosaka. This is my name for the tolosa black bean, which I’ve been growing since 2007. This is a beautiful, large, deeply black bean that is from the Basque region of Spain. Look it up, apparently it’s famous [Uprising Seeds offers it]. I just know it’s delicious and one of my favorites.

Red Forest (Reade Krobbe). Another Dutch Slow Food Ark variety [link here]. As with all of these beans I just like eating these by themselves, but they’re also very good in soups as they hold their shape well. I’ve also made red bean paste with them for sweets.

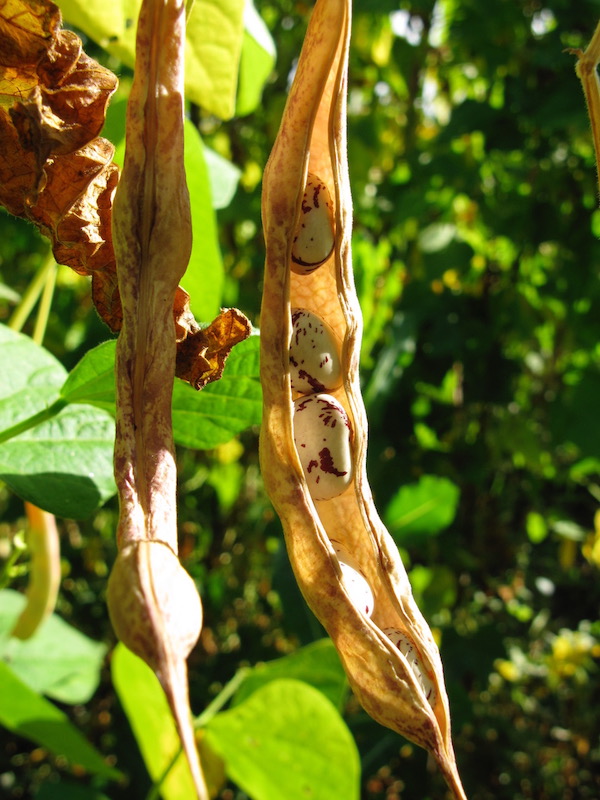
White Runner (Katherine’s). All of the other beans we grow are Phaseolus vulgaris, but these are Phaseolus coccineus. They are related to the more common Scarlet Runner beans but have white flowers and beans. As with all runner beans I’ve had they are very large with delicious meaty interiors and incredibly delicate skins when cooked. My friend Katherine Deumling was my original source for this variety and a neighbor of her family in Salem was the grower. I don’t remember the variety name, just that I got them from her and that they grow better for me than the better known Corona White Runner bean—which is even larger, but doesn’t ripen well here (even these runner beans are a little marginal and tend to mature a bit late).

Corn

Dakota Black Popcorn. pops bright white and with great fresh popcorn flavor, not at all like the big stale stuff you get in most bulk bins. If you have a grinder that will grind hard corn it makes a good addition to pancakes and bread (popcorn is very hard and many grinders aren’t strong enough to grind it).

Otto File Polenta Corn. A number of years ago I was in Italy and visited a wonderful little biodynamic market farm in Lucca. The farmer gave me an ear of his golden polenta corn (otto file, meaning eight rows in Italian, because there are eight rows of kernels on the slender cobs). I ended up planting it in my garden and it made amazing polenta—tons of corn flavor, beautiful golden color, slightly sweet—so I grew more. We use a relatively inexpensive Corona hand cranked grist mill to grind it into polenta, but there are many other options out there (these mills will also grind popcorn).  It can also be cooked whole, but it does not make good nixtamal in my opinion—very gummy.

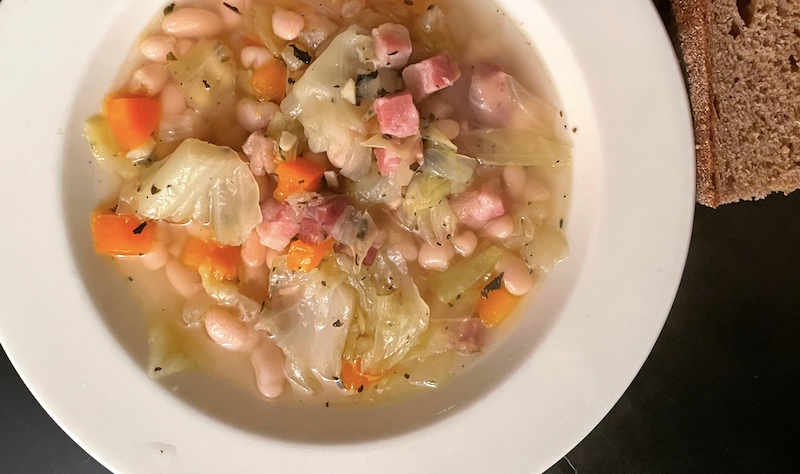
Top photo of a simple bean, green cabbage and bacon soup with carrots, onions and garlic.
Farm Bulletin: Otello's Pebbles, Stewarding a Bean's Genetics

Contributor Anthony Boutard writes: "Here is a note I prepared regarding Otello’s [Pebbles, one of the dried beans Anthony grows at Ayers Creek Farm]. On my restaurant availability list, I usually include a 'photo of the moment' followed by a note placing it in context. One week I didn’t have time to comb my photo files and draft a note, so I simply stated that due to a lack of a sponsor, there was no photo. That led to a series of fictitious sponsors."

Photo of the Moment
Generously Sponsored by: Bard, Rossini & Verdi Concepts™
Cantiamo, Salce

In 2015, we were sent an irritatingly small package of beans by Nancy Jenkins, a food writer and olive oil maker. People often leave kittens and cats at farms assuming they will be cared for in some unspecified way; mostly and fittingly, the caregivers are the farm’s coyotes or bald eagles always looking for a meal more exotic than the usual fare of mice and voles.

None
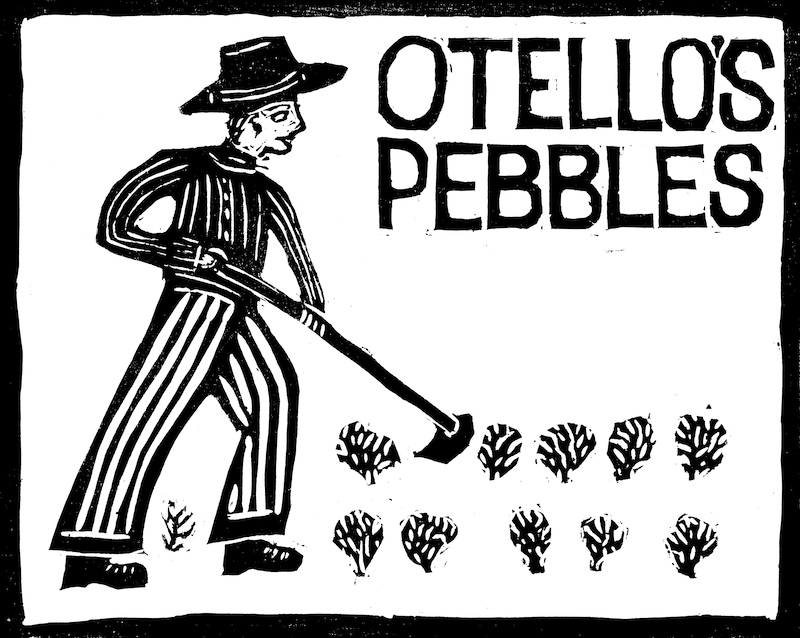
The label for Otello's Pebbles…is that the eponymous Otello?*

Likewise, small packages of pretty beans are sent or given to us in the hopes that we will become their genetic stewards. Sometimes, an endearing note explains that the beans are a family heirloom and were found in a late aunt’s garage where they had been stored for five years in a mason jar. As a further tug on the heartstrings, and doubling down on their pedigree, a charming name is given to them. A name in a tongue from the old country amps up the hype. Somehow, sending them to us assuages the custodian’s guilt of not carrying on the family tradition themselves. Despite claims made by various wags about sacred beans found in some ancient granary, garden beans are viable for about two years, after that their vitality drops off the cliff. Such claims are just as likely as the old temple cat that is still haunting the pyramid some 5,000 years later.

The package in question had a note, written by another person in the chain of stewardship. It noted that the bean was grown by someone called Otello who died early and had praised the bean as growing well in poor soil. Not much of an endorsement, and not a word about its culinary qualities. Worse, the package contained what appeared to be an assortment of types, something bean growers work hard to avoid. The custodian’s tag noted they were named "Fagioli bianci • grigi," again no first-hand endorsement of their culinary merit.

The package would have been relegated to the ACF seed museum (i.e. compost) except that Myrtha Zierock [an intern at the farm that year] and I were planting a block of soy and had space for a few more seeds. Some beans are promiscuous and will contaminate a field of a carefully managed commercial crop. Soy and garden beans do not cross pollinate so there was not harm in filling out the row. We joked that the beans looked like little pebbles and tossed them into the seeder. At harvest, we cooked up the beans and found they had their redeeming qualities. Because of their appearance, we named them Otello’s Pebbles.

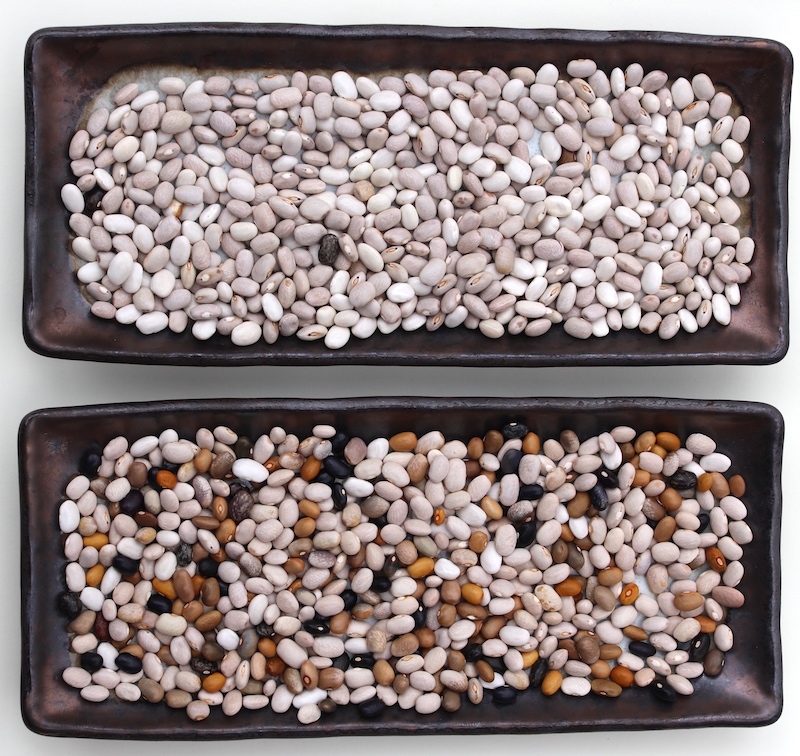
In preparing for the 2020 harvest, we went out to select the 2021 seed crop and discovered the beans had drifted away from the original beguiling mix that prompted our impulsive sowing, and were now almost entirely white or light gray. The translation of Otello’s name for them was "beans white • grey", so they were probably closer to his beans than the “pebbles” passed on from their custodian—those we received in the mail. We combed the field looking for every plant that produced something other than white and light grey. In the lower dish (top photo), you can see the restored variation which is close to those in the seed package Jenkins sent to us.

Does it matter? I think so. We grow many carefully managed beans, but for a bean suited to the stew pot, a bit of a topsy-turvy mix of flavors and textures make for a far more interesting ingredient. I assumed that the genetically chaotic mix would take care of itself, but I was wrong. We have to be just as diligent in our pebbled seed selection as we are with zolfino, for example. It is a bit more of a challenge because we need to make sure we have a full and balanced selection of the original colors, as opposed to selecting for just one color.

We have tried the new selection on the plate and last September’s work was worth the effort. The restructured variety is head-and-shoulders better flavored than the "white • grey" mix corresponding to Otello’s original bean. Frankly, it is no wonder Otello failed to rhapsodize over their quality. Indeed, it is now up there with the all of our other beans, even better than that first harvest that caught our attention. If you think Italian makes the bean sound sexier, then call it sassolini di Otello delivered in the style of Keven Kline, all the same to me. But be sure to try them. You won’t regret heeding the farmer’s suggestion.

Note: The sponsor’s motto is based on Act 4, Scene 3 of Othello when Desdemona sings the Willow Song in her distress and betrayal. The words are condensed from Verdi’s version “Salce, salce, salce, cantiamo, cantiamo, cantiamo, salce, salce, salce (willow, let us sing). I am partial to Rossini’s version, though. Here is a beautiful version in recital by Joyce DiDonato accompanied by David Zobel.

Top photo: Otello’s Pebbles, 2020 (upper) and 2021 (lower) by Anthony Boutard.

* In an exchange about the label (above), Anthony clarified that, alas, the farmer is not Otello: "Otello was long dead when I received the beans. The Otello's block is influenced by the simple, bold renderings of the early 20th Century Mexican woodblock prints, particularly those of María Izquierdo and David Alfaro Sigueiros."

Fermentation Fascination: Try It, You'll Like It, Guaranteed!

"Foods like yogurt, kimchi, sauerkraut and kombucha increased the diversity of gut microbes and led to lower levels of inflammation," according to an article in the New York Times describing a new study from researchers at Stanford University.

My summer, in a nutshell (or a pickle jar).

This is welcome news considering the pounds (and pounds) of cucumbers and beans I've been getting from our CSA this summer and turning into pickles. If you've read past posts about my methods for preserving the hundred-plus pounds of fabulous Astiana tomatoes from Ayers Creek Farm that I roast every summer, you'll know that I'm not big on huge messes or laborious processes.

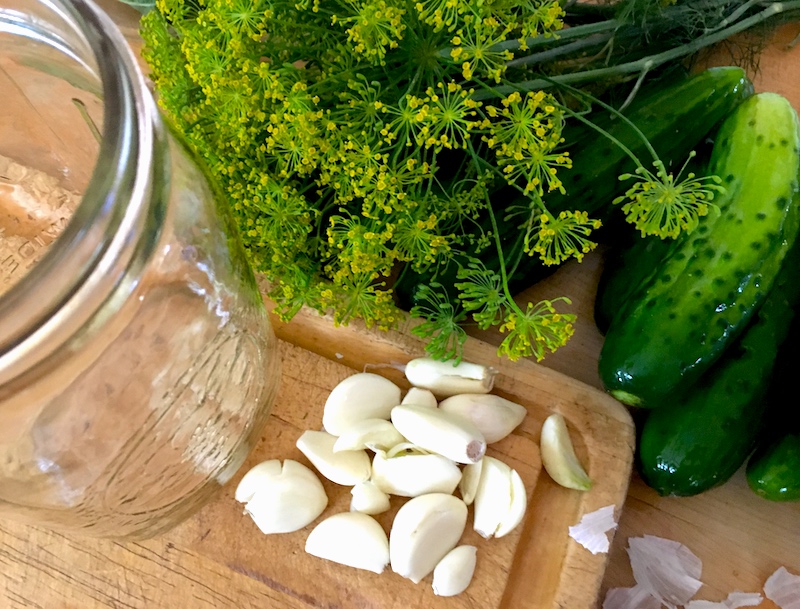
Which is why pickling vegetables by lacto-fermentation is high on my list. First, it's ridiculously easy…all it takes is salt, water and time, often a week or less. You can use herbs to flavor it—I'm partial to traditional dill, garlic and mustard seeds for cukes and "dilly beans"—but plain is just fine, too. Second, it requires no special equipment, just a clean glass jar with a tight-fitting lid, and no cooking or heating, a godsend on hot summer days when fresh vegetables are cascading in from local farms. Third is the health aspect, outlined in the study linked above.

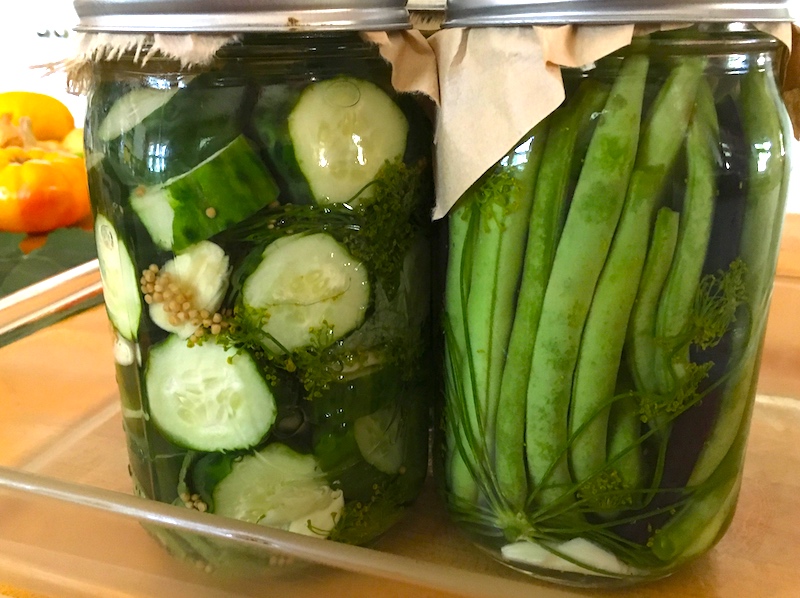
A paper coffee filter, a canning ring, and your pickles can "breathe"!

But really, I wouldn't bother with it if these pickles didn't taste great. Crunchy, briny without being overly tart, they have a freshness and snap that you don't get from water bath or pressure-canned methods. The only drawback to this method is that because the live bacteria hasn't been killed by cooking, these pickles aren't shelf-stable and will need to be refrigerated.

So far this summer I've made sauerkraut, the aforementioned cucumber pickles and dilly beans, and will soon be making a couple of quarts of Hank Shaw's sour corn to have with tacos, relishes and salads. After that, who knows? I'll definitely keep you posted!

Just click for recipes for sauerkraut, garlic dill pickles, quick refrigerator pickles, and Hank Shaw's Southern Sour Corn.

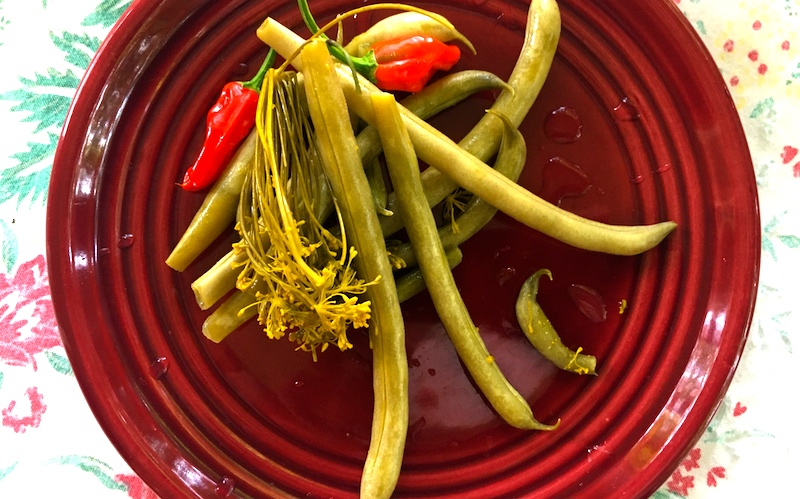
Lacto-Fermented Garlic "Dilly" Beans

2 clean wide-mouth quart jars
2 lbs. green beans
2 qts. water
6 Tbsp. sea salt
4 dill flower heads
1 head garlic, cloves separated and peeled

Make a 5 percent brine solution by adding the salt to the 2 quarts water in a saucepan or bowl. Stir until the salt dissolves completely.

Push one dill flower head into the bottom of the quart jar along with two cloves of garlic. Holding the jar on its side, start packing the beans into the jar along with half of the garlic cloves. The tighter the beans are packed, the less likely they'll be to float up to the surface during pickling. Make sure the beans stay 1" below the rim of the jar; if they're too long, simply snap them off.

When you can't jam any more beans into the jar, take a second dill flower head and push it into the upright beans, again trying to keep it 1" below the rim. Stir the brine to dissolve any remaining salt crystals and pour it into the jar of beans until it rises to 1/2" below the rim.

Pickle pipe airlock for pickling.

Place a lid on the jar and screw it down until it's finger-tight, then back it off about a half turn to give the bacteria room to "breathe" and for any brine to escape during pickling. You can also use a commercial pickle pipe secured with a canning ring for the same purpose, or simply take half a #4 or larger paper coffee filter, place it over the top of the jar and screw it down with a canning ring.

Repeat with second jar.

Place both jars on a plate or in a small baking dish to catch any liquid that escapes and keep them in a cool, dark place (like a basement) for several days. In a couple of days you will notice the brine getting cloudy, and it will have a distinctly vinegar-y smell. This means your brine is working! After five days you can test the beans to see if they're to your liking or leave them for another couple of days and they'll continue to get more pickled. (I usually leave them at least a week to 10 days.)

Because this method does not kill the (healthful, probiotic) live bacteria in the brine through processing in a water bath or pressure canner, the pickles are not shelf stable and must be stored in the refrigerator. If you used a pickle pipe or coffee filter for the pickling process, simply remove them and replace with a solid lid or canning lid and ring.

Don't panic if this is floating on your pickles. Just lift out and toss.

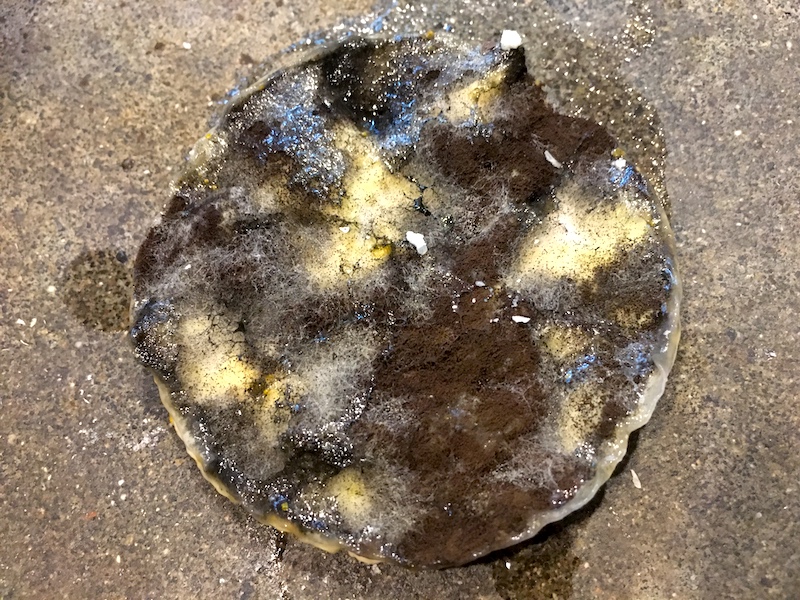
NOTE: When you open the jar you may see a spongy, grey mass floating on top of your pickles (photo, right). As Douglas Adams wrote in "The Hitchhiker's Guide to the Galaxy," DON'T PANIC. This is perfectly normal and your pickles are not affected.  The spongy mass can be easily lifted out and disposed of. Your pickles are good to go!

Sopa Tarasca: A Bean Soup 20 Years in the Making

We've been blowing through series television lately—rewatching the entire umpteen seasons of Deep Space Nine, being charmed by the more recent Ted Lasso and drawn in by the Canadian show Kim's Convenience—and, when we need a break, watching a documentary here and there. Recently we took in a biography of Diana Kennedy, the famed English-born authority on Mexican cooking, filmed in her home in the hills of the state of Michoacán and who, in her 96th year, is still as feisty and fiery as ever.

It was twenty years ago that our son took a three-week foreign studies tour to the town of Morelia in Michoacán, a city of almost a million not far from Ms. Kennedy's home. He and five of his fellow high school students from his Spanish class stayed with Mexican host families in the city, taking language classes and touring the area with their teacher.

Organic beans for Diana Kennedy's soup? Perfect!

The other students were mostly consumed with going to bars (though the official drinking age was 21), eschewing Mexican food in favor of hamburgers and pizza. Our son was more intrigued with exploring Mexican regional specialties like the varieties of moles—he still waxes poetic about one exceptionally bitter version—as well as a garlic bread soup called Sopa de Ajo and another, a puréed bean soup called Sopa Tarasca. (His teacher was quite impressed.)

After watching the documentary about Kennedy, I was browsing through my not-insubstantial collection of her cookbooks and came across a recipe for that very bean soup. I happened to have a quart of cooked borlotto beans from Ayers Creek Farm left over from a dinner earlier in the week, so it presented an opportunity I couldn't well refuse.

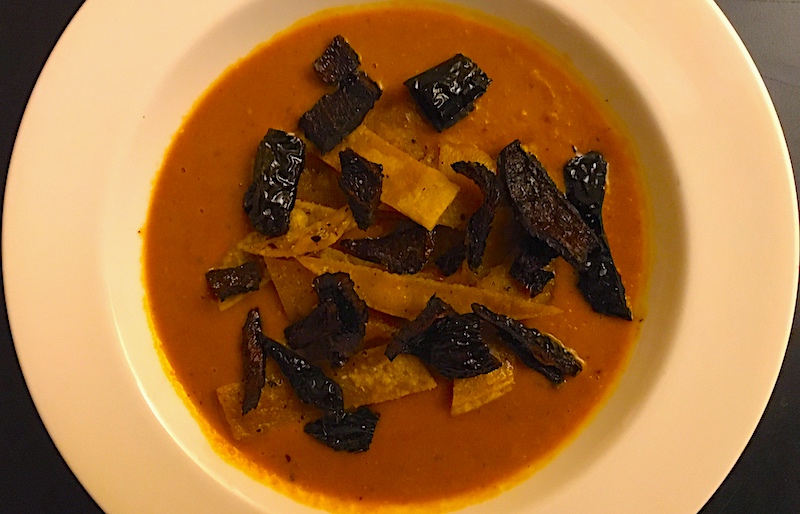
Sopa Tarasca is named after the Tarascan Indians of Michoacán—the popular, if somewhat derogatory, name for the indigenous Purépecha culture which continues to maintain a significant population of nearly 200,000 in the state. It is a deeply flavorful bowl of puréed beans, tomatoes and chiles topped with fried chiles, tortilla strips and other condiments.

The soup itself is a fairly simple affair and comes together quickly, and the idea of the fried chiles crumbled on top will come in handy in the future as a crunchy topping for salads, tacos, nachos, dips or other dishes needing a crispy, smoky saltiness. See what you think!

Sopa Tarasca (Tarascan Bean and Tomato Soup)

Slightly nodified from a recipe in The Cuisines of Mexico by Diana Kennedy

For the toppings:
Vegetable oil (canola or grapeseed)
3 dried chiles pasilla (dried ancho chiles work here, too), cut with scissors into small pieces
4 corn tortillas cut into strips
Queso fresco, crumbled
Sour cream

For the soup:
2 dried ancho chiles
2 medium tomatoes or 1 1/4 c. roasted tomatoes
3 cloves garlic
1/4 onion
3 Tbsp. lard or filtered bacon drippings
4 c. cooked pinto or borlotto beans with their liquid
2 1/2 c. pork or chicken stock
1 tsp. oregano (preferably Mexican oregano)
Salt to taste

For the condiments, place large frying pan over high heat and pour in 1/2" or so of vegetable oil. When a small piece of tortilla strip is dropped in and sizzles with lively bubbles, it's hot enough. Put half of the tortilla strips into the oil and brown slightly, remove them from the oil with a wire scoop (spider) onto paper towels. Salt as soon as they come out of the oil. Repeat with remaining half of tortilla strips. While tortilla strips cool, put the pasilla chile pieces into your wire scoop and submerge in hot oil for three seconds. Remove to paper towels and salt.

In a heat-proof bowl, tear the ancho chiles into pieces, removing the seeds and veins. Add one cup boiling water and soak for 20 to 30 minutes.

In a food processor, blend the tomatoes, garlic and onion into a smooth purée. Melt the fat in a large Dutch oven or soup pot over high heat. Pour in the tomato purée, being careful since it may splatter when the mixture hits the hot fat. Cook for 5 minutes, stirring to make sure it doesn't stick. While the tomato mixture cooks, purée the beans, bean liquid, softened ancho chiles and their liquid in the food processor. Turn down the heat under the tomato mixture to medium-low and stir in the the bean purée and oregano. Cook for another 8 minutes, stirring frequently to keep it from sticking.

Add stock and stir to combine. Add salt to taste. Simmer on very low heat, stirring frequently, until ready to serve. This is supposed to be a thick soup, and it will thicken as it simmers, but you can add more stock as needed to get it the consistency you prefer. Serve with crumbled cheese, sour cream, tortilla strips and fried chiles.

You can also make the soup ahead of time, then fry the tortillas and chiles while you reheat the soup.

Got Beans? Make a Pot of Chili!

Unlike the mysterious run on toilet paper—no pun intended there—when folks found out that they may have to "shelter in place" for several weeks due to the coronavirus, it made sense to stock up on dried goods that can last in the pantry for at least that long. As local food missionaries Katherine Deumling of Cook With What You Have and Jim Dixon of Real Good Food have preached from their respective pulpits, you can cook up a pot of beans at the beginning of the week and use the beans in several different dishes, or whip up a big batch of one dish to divide and freeze for later.

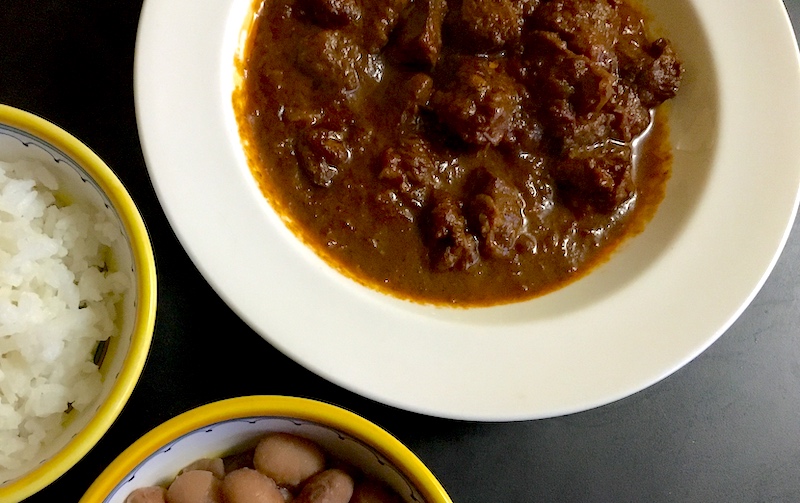
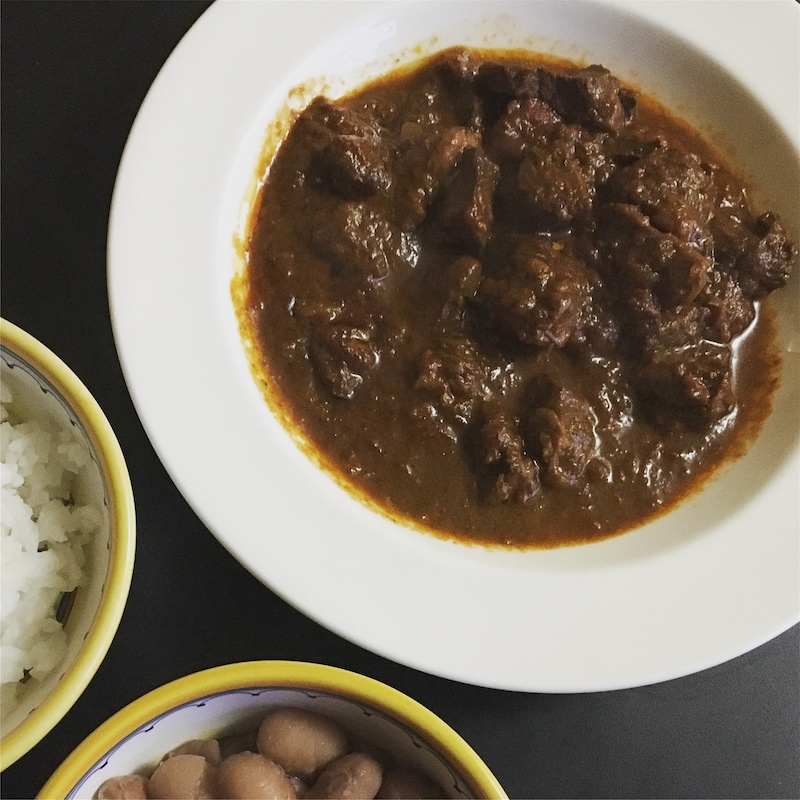
My recipe for chili takes a middle road, cooking the beans separately from the meat and chile sauce. The beans versus no-beans in chili seems to depend on whether you hail from north of the Mason Dixon or to its south, but there are also cultural elements at play, not to mention the most important indicator: how your mom made it. Me, I grew up with beans in chili, but because I'm a natural contrarian, sometimes I just feel like keeping the two unsullied until they consummate their union in my bowl, showered with the happy blessings of chopped sweet onion and grated cheese.
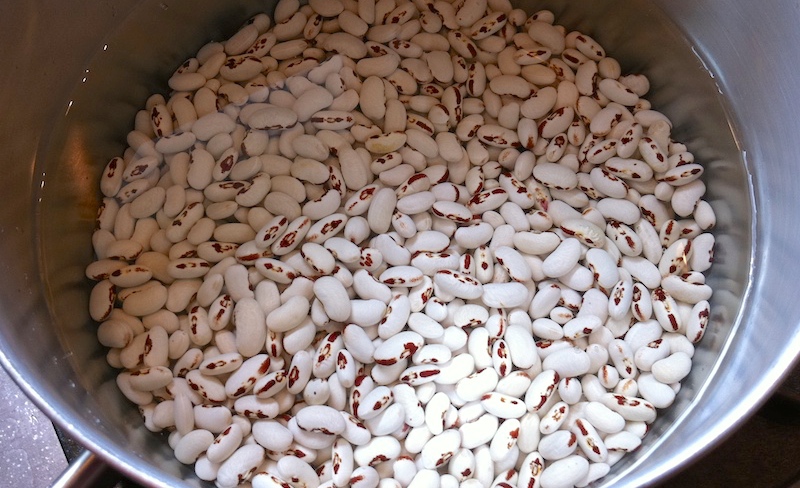
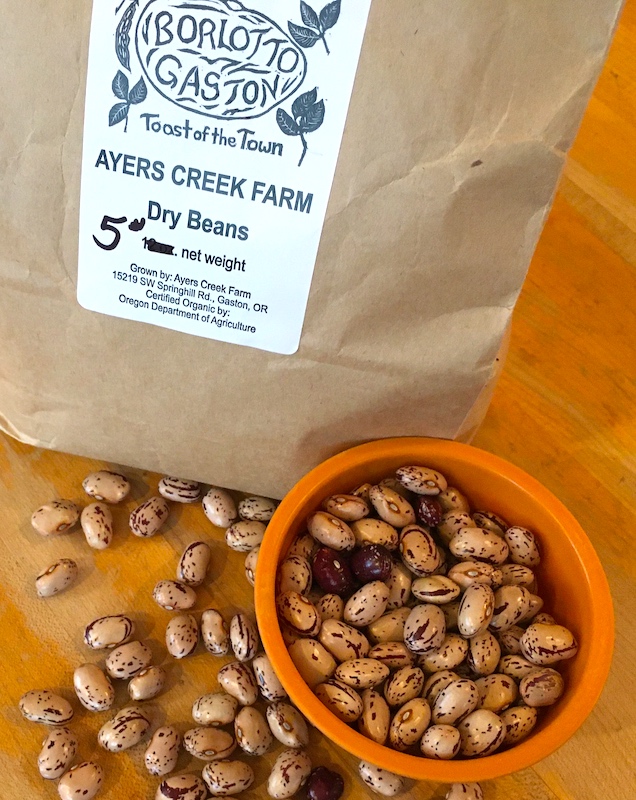
I'm also not doctrinaire when it comes to the type of beans to use. I've even been known, in straitened moments, to use canned kidney beans, but my preferences run to heritage varieties like cranberry or scarlet runner, or organic Borlotto Gaston from Ayers Creek Farm. The night before, put three-quarters of a pound of beans in a pot, cover with water by one inch, put a lid on the pot and leave on the counter to soak. The next day, drain them, put them in a pot, cover them with fresh water and cook on the stove until tender, or you Northerners can drain the soaking water and add them to the chile sauce to simmer with the meat.

Beef Chili

For the chile sauce:
6 dried ancho chiles, seeded and torn into pieces
2 dried cayenne chiles, seeded and torn into pieces (optional)
3 1/2 c. boiling water
1 Tbsp. cumin seeds, toasted (see below)
2 Tbsp. (6-8) garlic cloves
4 tsp. oregano
1 Tbsp. smoked Spanish pimenton
2 Tbsp. paprika
1 Tbsp. sugar
1 Tbsp. salt

For the chili:
1 large onion, chopped in 1/2" cubes
2 Tbsp. flour
3-4 lbs. chuck roast, cut in 3/4" cubes (pork shoulder also works)
2 bay leaves
1 qt. roasted tomatoes, or 28-oz. can whole tomatoes
Salt

In a small, dry frying pan over medium heat, toast the cumin seeds briefly, stirring constantly, until they release their aroma.

Place the torn chile pieces in a heat-proof bowl and pour the boiling water over them. Soak for 30 min. until they are soft and pliable. Drain them, reserving the soaking water, and place them in the bowl of a food processor or blender. Add remaining ingredients (including the toasted cumin seeds) and 1/2 c. soaking liquid and process till smooth, gradually adding the remaining soaking water.

Heat oil in large Dutch oven over medium high heat. When it shimmers, add the chopped onion and sauté until tender. Add flour and stir continuously for up to 2 minutes until the flour loses its raw taste. Add meat, chile sauce, tomatoes and bay leaves. Bring to a boil, then reduce heat to simmer for 1 1/2 to 2 hours. Stir occasionally, adding water if it seems too dry. Add salt to taste.

Serve with cooked beans and rice on the side, along with finely chopped sweet onion and grated cheese to sprinkle on top.

Farm Bulletin: Soak Beans Before Cooking, the Farmer's Plaint

Some cooking techniques are writ in stone. Preheating your oven before baking. Rinsing basmati rice in several changes of water before cooking. Stuff like that. Others are matters of debate, with pros and cons argued vociferously on either side. One of those is soaking dried beans overnight before cooking. To no one's surprise, I give credence to contributor Anthony Boutard of Ayers Creek Farm's explanation (see below), who, in my opinion, with Carol Boutard, grows some of the finest beans in all the land.

Why has the practice of soaking grains and beans prior to cooking persisted for several millennia? Biologically, two separate events occur when the bean awakens in the presence of moisture.

Ayers Creek Farm borlotti beans.

Germinating seeds release into the surrounding soil nasty compounds when they germinate. These compounds discourage insects, fungi and bacteria from attacking the seedling before its own defenses are developed. Some seeds also release compounds that prevent neighboring seeds from germinating, a phenomenon called allelopathy. Some people claim these compounds are nutritious and tasty.

Poppycock, I say.

I suggest tasting the soaking water and decide for yourself whether the stuff is tasty…it isn’t. This is one reason why people traditionally soaked grains and legumes, and then drained the soaking liquid before cooking them.

Soaking makes beans sweeter and smoother.

There is a second reason, more of an aesthetic gesture. The seed is very carefully packaged to provide energy in the form of simple sugars and building materials in the form of amino acids when it breaks dormancy and the embryo begins to grow. Millions of simple sugars are connected together to form starch molecules. The amino acids are connected to one another to form proteins. The starches and proteins are densely packed around the embryonic plant. When the seed germinates (i.e. soaked overnight), specialized enzymes snip apart the starches and proteins, and those unpacked units are then assembled to grow the plant. Imagine a pallet of lumber that is strapped together, efficiently packaged for storage and transport, but not yet a house. The enzymes are akin to carpenters, pulling the pallet apart and reassembling it. They also need energy to fuel their work in the form of simple sugars until the seedling is ready to photosynthesize its own food.

Black beans.

Cooking without soaking relies on the brute force of heat to break apart the package rather than the elegant, gentle, natural mechanism given us in the simple seed. Akin to running over the pallet with a bulldozer. I find the flavor and texture are better with soaking, a bit sweeter and smoother. I cannot fathom the objection to soaking them overnight, as though it is some major inconvenience. Bear in mind, the farmer spent several months tending the crop for your table.  What’s a few more hours to do justice to the farmer’s careful effort? 

So that's it.

You can find a good selection of Ayers Creek Farm dried beans at Rubinette Produce.

Braising Weather: A Pot of Beans

It's officially fall. The ash trees surrounding our house are turning golden, coloring the light that spills in the kitchen windows. The leaves that have fallen are dry and crispy, crunching under the feet of the neighborhood children walking to school. The urge to kick through the drifts of leaves on the parking strip is almost impossible to resist, and I can hear that most autumnal of sounds as the kids (and sometimes their parents) succumb to their siren song.

Nighttime temperatures are getting down into the 40s, requiring the addition of thick comforters to the beds, and mornings are brisk, with just enough of a chill to require pulling on a fleece jacket to walk the dogs first thing. The days warm up to the 70s by noon, and a glass of wine on the porch of an evening as the sun sets isn't out of the question just yet, warmth-wise.
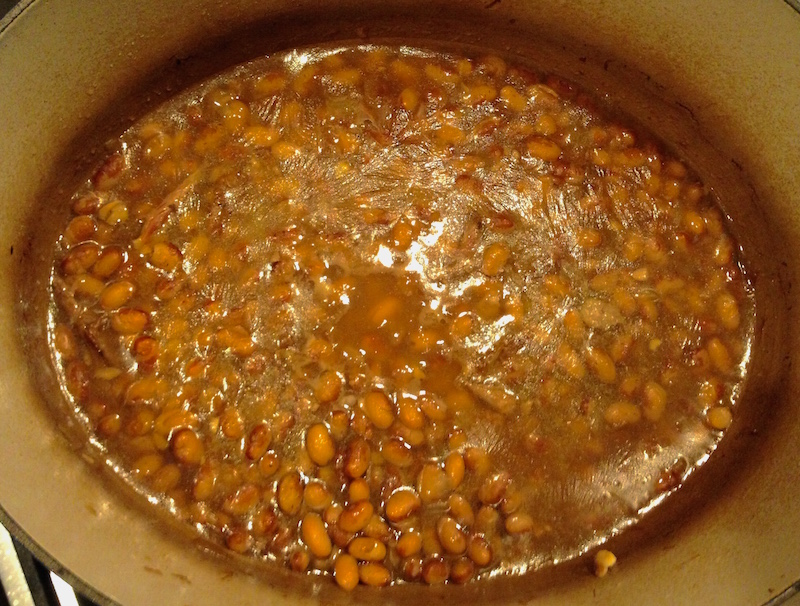
This is what my parents used to call nigh-perfect Indian summer weather in the Northwest, though I'm beginning to think of it more and more as the onset of braising weather, time to pull out the Dutch oven for the season of low and slow-cooked meats and vegetables.

This year's crop of dried beans have begun showing up at the farmers' markets, and I was recently gifted some Rockwell beans from Willowood Farm on Washington's Whidbey Island. This variety was originally grown by an island pioneer, Elisha Rockwell, in the late 1800s, and it was brought back into production recently by farmer Georgie Smith when she took over the land her family had been farming on Ebey's Prairie since the 1890s.

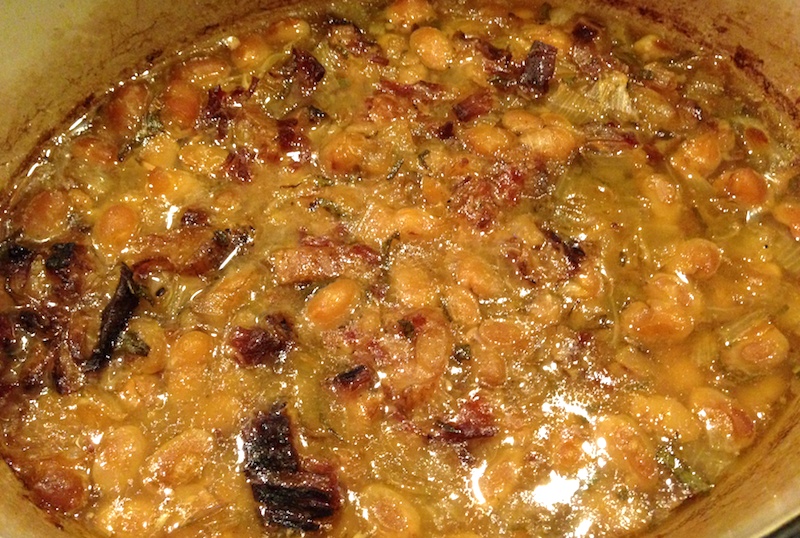
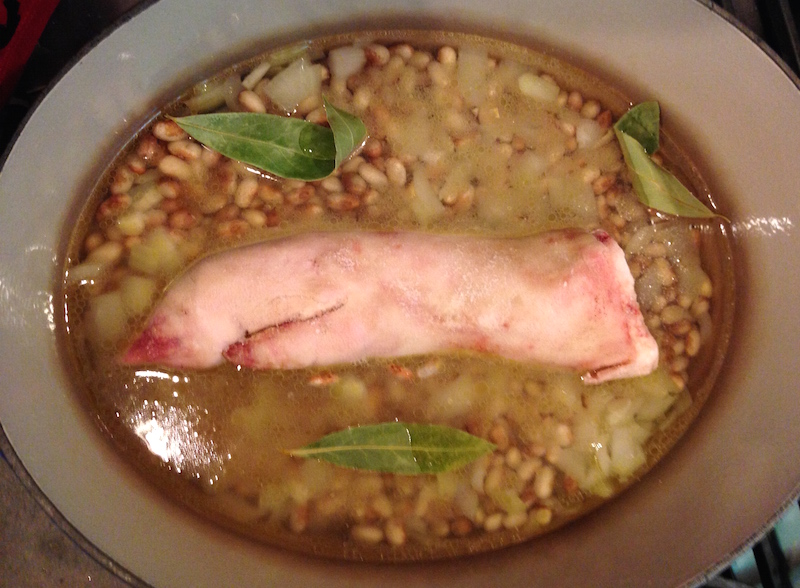
Beans don't need much besides water, onions and garlic to make a mighty tasty main course, served with a hunk of hearty bread and maybe a drizzle of olive oil, but I happened to have a pig trotter (top photo) from the Square Peg Farm pig I'd butchered last winter. Beans and pork are a natural pairing, and the fattier the cut of pig the better. Trotters are almost all fat, and over several hours it gave a porky unctuousness to the pot. A half pound of bacon works well, too, and can be chopped or shredded before or after braising. Even a pound of pork shoulder will do its work on the beans, and can be shredded afterwards to make a beany, porky chili.

Regardless of how you decide to cook them, grab a few different kinds of beans from your local farmers' market and take them for a spin in a pot. I guarantee you'll find one (or more) you'll love, not to mention they'll warm up your family's bellies on these crisp fall nights.

Basic Braised Beans

1 lb. dried beans
3 Tbsp. olive oil
1 onion, chopped roughly
3 cloves garlic, chopped fine
Water
1 Tbsp. salt, plus more to taste

Optional:
3 bay leaves
Pork (pig trotter, 1/2 lb. bacon, 1 lb. pork shoulder)

Depending on the type of bean, you may need to soak them overnight in water (cover by 2"). Check with the farmer or follow directions if they're packaged. Drain and rinse prior to cooking.

Preheat oven to 300°.

On top of stove over medium heat, add oil to pot and heat until it shimmers. Add onion and sauté until tender, then add garlic, sautéing briefly until it's fragrant but not browned. Add drained beans and cover with fresh water by 1". Add salt and stir briefly. Add bay leaves and pork if using.

When it comes to a simmer, cover the pot and put it in the oven for at least four hours or until beans are tender and meat (if used) is falling apart. Check occasionally and add water to cover if the beans have absorbed it all (the amount of water needed will vary with the type of beans and if they have been presoaked). If meat has been used, remove it to a cutting board and chop or shred it, then add it back to the beans.

This can also be done on top of the stove. Simply keep the beans on a low simmer, covered, and check occasionally to make sure all the liquid hasn't absorbed.

More bean recipes: Baked Beans Italian Style, Backyard Barbecue Beans, Mexican-Style Black Bean and Greens Soup.