In Season: Creamy Fava Risotto for the Win!

My neighbor Bill has a backyard vegetable garden that rivals some of our small-acreage farmers. He's currently havesting fava beans, snap and shelling peas, lettuces, herbs and radishes, with several beans, all sorts of peppers, Astiana tomatoes, carrots, berries, figs, cucumbers, shiso, basil and squashes in the queue—there are undoubtedly others, too, but who can keep track?

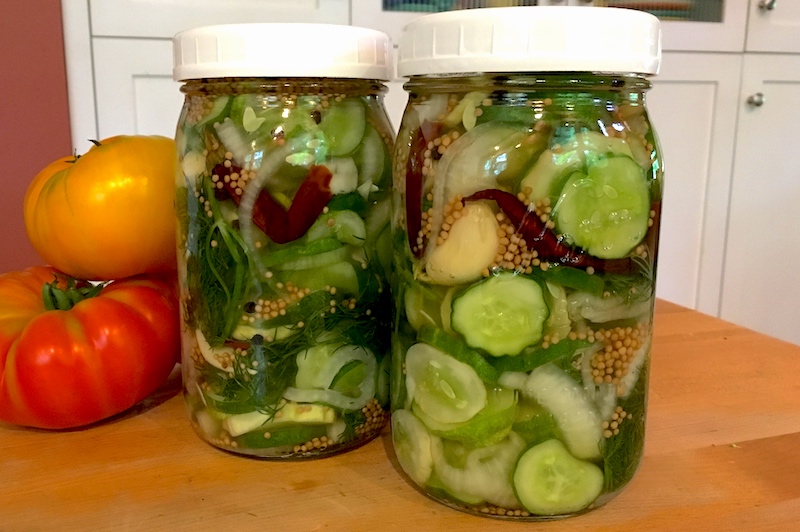
He and his partner in crime, Jen, are both teachers and spend much of the summer pickling, preserving and freezing the bounty from their back yard, pulling out jars and bottles that tide them over throughout the winter months.  Fortunately for me, they're generous to a fault and live just two blocks away.

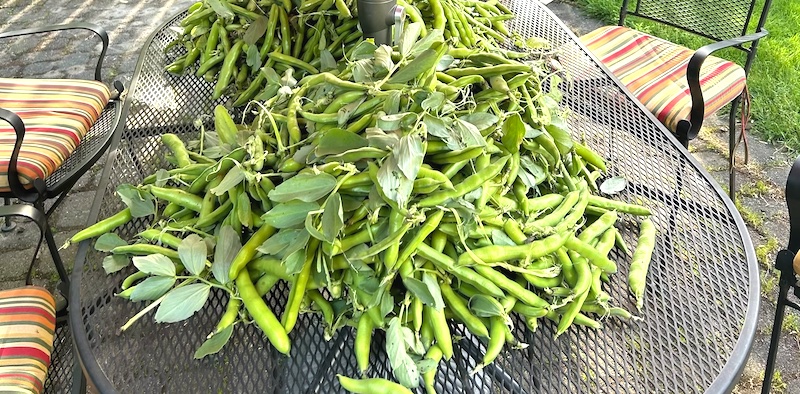
Above is his second harvest of fava beans. He shared some of the first picking, which I added to a salad under a gorgeous filet of grilled salmon, then he asked if I could help out with this second massive haul. My answer was something akin to "Hell yes!" and I rushed over with bag in hand, coming home with at least five pounds of pods.

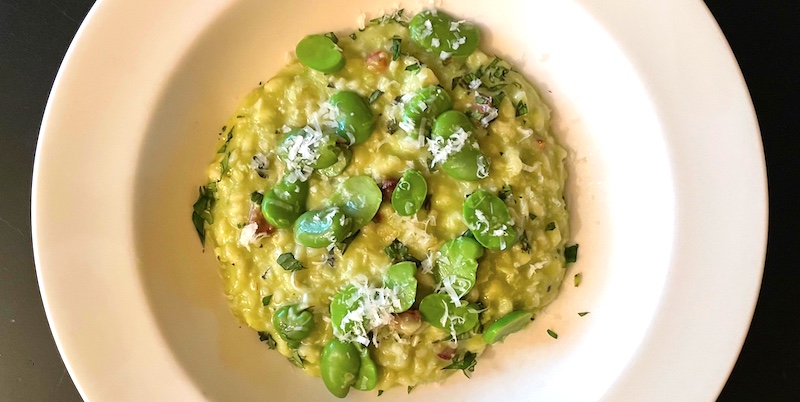
Bill had mentioned making risotto with some of the beans from his first picking, so since it was a mild spring evening I decided to follow suit. After doing some research online, I decided to eschew the suggestions combining favas and asparagus and focus instead on the favas themselves, accented by a bit of Dave's smoky bacon and some of the savory Cretin mint from Alice Doyle at Log House Plants in Cottage Grove.

Fresh Fava Bean Risotto

4 lbs. fava bean pods
1/4 lb. bacon, cut in small 1/4" cubes
2 Tbsp. olive oil
1/2 medium onion, finely chopped
4 cloves garlic, finely minced
2 c. arborio or other short-grained Italian rice
1 c. dry white wine
4 c. chicken broth
1 c. Pecorino Romano, finely grated
1 c. Parmigiano Reggiano, finely grated
1/2 c. (1 stick) frozen butter, cut crosswise into quarters
2 Tbsp. mint leaves, finely chopped
Salt to taste

Bring a medium saucepan full of water to a boil and salt the water. While it heats, shuck the fava beans into a mixing bowl and discard the pods. When the water boils add the beans to the pot. When it returns to a boil, cook for three minutes, drain and submerge in ice water. When they cool, drain again and remove outer casings from the largest pods (or about 1/4 of the total). Set the peeled pods aside. Place the remaining unpeeled beans in a food processor or blender and process, adding just enough water to make a smooth purée. Set aside.

Heat the stock in a medium saucepan and keep warm over low heat.

Place the bacon in a large saucepan or risotto pot and fry over medium heat until crispy. When it's almost crisp, add the olive oil and heat for a few seconds, then add the onion and garlic to the pan and sauté until tender. Add the rice and stir to combine.

When the rice begins to get hot and crackle, add the white wine and stir gently until it's absorbed. Then begin adding the hot broth a ladle at a time, stirring gently and adding another ladle of stock as it absorbs. Repeat until the rice is almost done (it will be al dente but not crunchy), stir in the fava purée and allow it to come to a simmer for three minutes. Add the cold butter and a heaping cup of the grated cheeses and stir vigorously to emulsify the butter. Check for salt adding as needed.

I like to serve the risotto in the pan with a ladle, scattering the peeled favas over the top with the mint and grated cheese, though for a "company dinner" you might want to plate it in individual wide bowls garnished with the peeled beans, mint and cheese. (Make sure to serve plenty of grated cheese on the side!) A salad of soft lettuces is ideal to serve with this risotto, especially with my Sweet Red Wine Vinaigrette dressing.


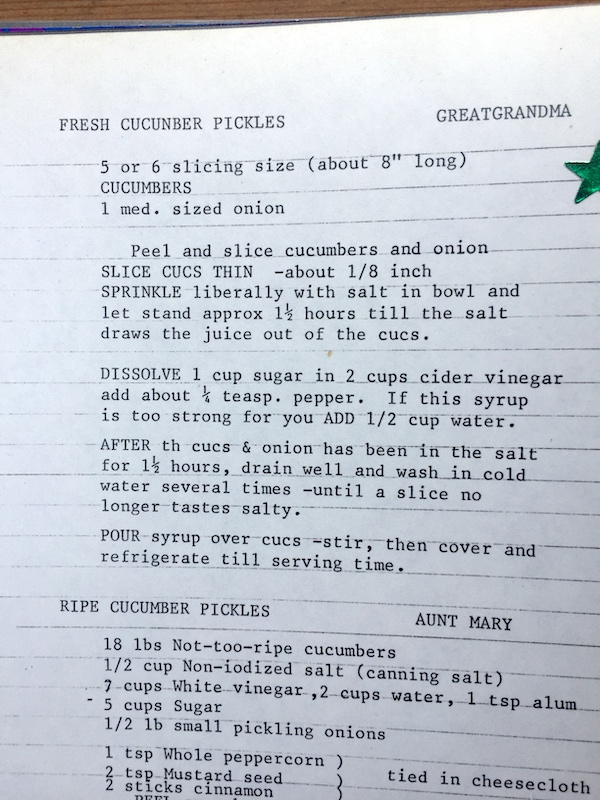
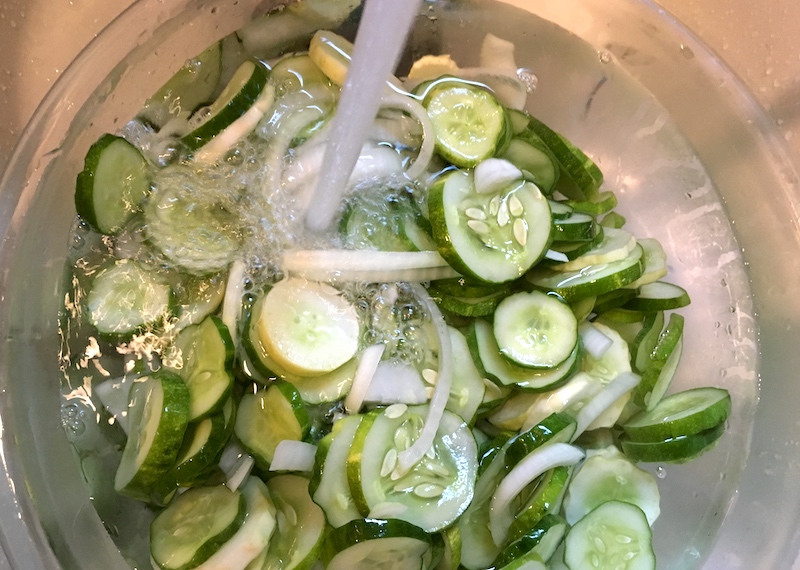
Get Jen's great-grandmother's recipe for Quick Refrigerator Pickles.

Following Summer's Lead: Fried Squash Blossoms a Fleeting Pleasure

My neighbors Bill and Jen, as I may have mentioned before, have an amazing garden where, on a typical Portland city lot, they grow enough herbs, vegetables and even fruit to pretty much last them through the winter. They also ferment a fair amount of the onions, beets and cukes in their raised beds, as well as canning and smoking albacore and salmon.

Stuff and twist tops to close.

Needless to say, I'm gratified when they ask me to babysit their garden in the summer when they're out of town, harvesting whatever looks good—which is, needless to say, just about everything.

This last week they were visiting friends in Alaska who are fishing for salmon this time of year, so I was told to help myself to the beans, zukes, tomatoes and anything else that was ripening. The costata romanesco, a ribbed zucchini, my favorite type, and another variety, the rampicante, also delicious, were putting out flowers with abandon, so I snipped a dozen of the male flowers—not the ones that eventually grow a squash but are simply a flower on a stem—and brought them home.

I had a few padron peppers that had come with my CSA share from Cully Neighborhood Farm, so stuffed squash blossoms with blistered peppers sounded like a perfect snack for a leisurely happy hour on the patio. No recipe was required, just zhuzhing some cream cheese for stuffing into the blossoms, rolling them in flour and egg, then frying in hot oil. You could make a schmear with smoked fish, too, or combine herbs, chopped hot peppers and a melty cheese—think jalapeño poppers—or any other combination that appeals at the moment.

Inspiration is what this time of year is all about, so my advice is to get creative and make the most of the season. Time's a-wastin'!

Stuffed Squash Blossoms

10-12 squash blossoms
2 oz. cream cheese
1 green onion, green parts only, finely chopped
1 clove garlic, pressed (or mashed and finely chopped)
1-2 Tbsp. parmesan, finely grated
Salt
1/2 c. flour
2 eggs, whisked well
1/4 c. canola oil

In a small mixing bowl, combine the cream cheese, green onion, garlic and parmesan. Salt to taste. (As noted above, you can make the stuffing with whatever soft filling suits your fancy.)

Put the flour on a plate or flat-bottomed pan (like a cake pan or wide pasta bowl). Whisk the eggs in another cake pan or wide pasta bowl.

To prepare squash blossoms, take a paring knife and make a slit from the base to the top of one side of the blossom. Open the blossom carefully in order to remove the hard yellow anther—it is edible, so this is not strictly necessary, but I'm not fond of its texture. Then, depending on the size of the blossom, use anywhere from a teaspoon to a tablespoon to fill the base of the blossom. (It will take less than you think, and a little goes a long way.)

Fill all the blossoms, twisting the flower tops to help close the blossom, then heat the oil in a large frying pan until almost smoking (300° is the target temperature). While the oil heats, take four blossoms and roll them one at a time in the flour to coat, then roll each in the egg, then roll in the flour again. Make sure the slit in the blossom is closed so the filling won't leak out—this is why you don't want to overfill with stuffing—and place the blossoms in the hot oil. Fry until golden on one side, flip over with tongs and fry the other side. Repeat with remaining blossoms.

Shower lightly with salt and serve.

Fermentation Fascination: Rave-worthy Quick Refrigerator Pickles

I'm not a woo-woo sort of person. Pragmatism runs deep in my veins, but recently it's been feeling like the universe is pointing me in the direction of fermentation. Not in a Portlandia "I can pickle that" way, though the show definitely picked up on a trend here with almost every chef in town featuring her own house-made pickles on every plate.

Great-grandma's recipe.

Granted, for several years I've been saying "This is the year I'm going to learn to make pickles!"—or kimchi or sauerkraut or whatever. And the year comes and goes without much progress being made, though I've participated in a few pickling sessions with friends. One of those sessions involved making pickled onions with my neighbors Bill and Jen, who have a huge garden on their city lot and preserve a great deal of what they grow every year.

When I dropped by their place to pick up some cucumbers the other day, Jen brought out one of two thick, three-ring binders full of favorite family recipes that her grandmother had carefully typed out—color me envious! It included one from her great-grandmother for fresh cucumber pickles that are ready in 24 hours. Need I mention that anything quick and easy has my name written all over it?

Rinse those cukes!

And indeed, when I got home, I sliced up those cucumbers, salted them down per great-grandma's instructions, made the brine, and a couple of hours later had two quart jars of pickles sitting in the fridge. I admit I sampled them before the 24 hours had gone by and they were delightful. So good, in fact, that they ended up coming with us that very evening as part of an antipasto platter we were taking to celebrate our friends' new home.

As for future fermentation festivities? Turns out the universe wasn't done with me just yet. Dave gave me a copy of Sandor Katz's The Art of Fermentation as an anniversary present, so expect to read about those adventures in future installments!

Great-Grandma's Fresh Cucumber Pickles

From my neighbor Jen.

5-6 cucumbers, about 8" long
1 medium onion
3-4 Tbsp. salt
2 c. cider vinegar
1/2 c. sugar
1/2 c. water
Optional: mustard seeds, peppercorns, fresh dill, dried chiles, whole garlic cloves

Slice cucumbers into 1/8" coins. Slice onion into quarters lengthwise, then into 1/4" slices crosswise. Combine in large bowl. Add salt and mix. Place in refrigerator for 90 minutes.

While cucumber mixture is soaking, in a medium-sized pan heat vinegar and water to a bare simmer. Add sugar. Stir until it dissolves, then add any desired spices (mustard seeds, pappercorns, dried chiles and garlic cloves). Allow to cool slightly.

When cucumbers are ready, rinse in several changes of running water, draining thoroughly between rinses. (Great-grandma says to rinse until they no longer taste of salt, but mine never did get to that stage.) Drain thoroughly. Pack cucumbers and onions into quart jars, layering them with spices from the brine and the fresh dill. Pour brine over packed cucumbers, using a chopstick inserted down the side to press out air bubbles as much as possible. Cover with lid and put in refrigerator. The pickles will be ready in 24 hours. Makes approximately 2 quarts.