Guest Essay: Patience

In previous posts I've written about my love of cookbooks and my admiration-verging-on-adoration for the inimitable Julia Child. When my friend Mary Bartlett—chef, author, bon vivant and part-time resident of Portland and Paris where she co-hosted the legendary Sunday Suppers held at Jim Haynes atelier in the City of Light—posted the following essay on her Facebook page, I immediately asked if I could repost it here. Mary generously acceded.

"Beautiful!"

"Delicious!"

"Marvelous."

"Go very lightly on the brown sugar."

"My favorite!"

(Scribblings in my cookbook.)

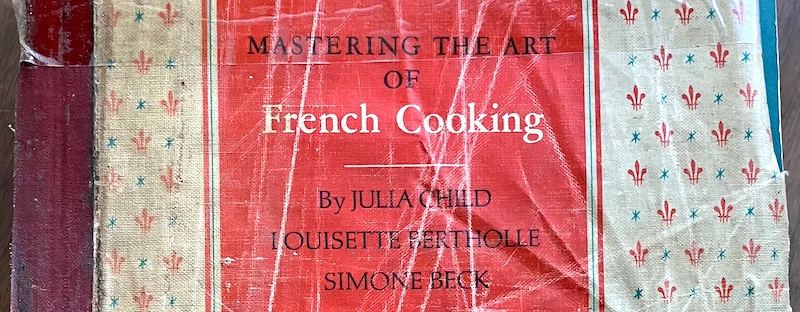
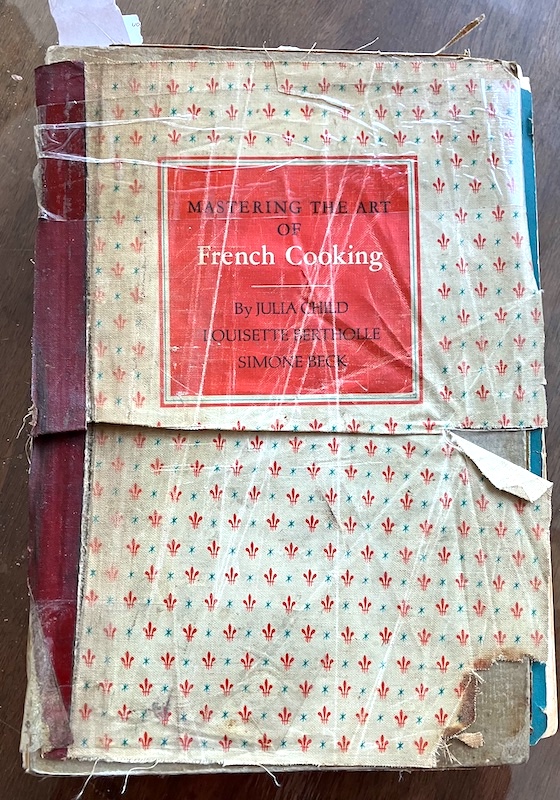
Boston. 1969. An aunt gives me Mastering the Art of French Cooking by Julia Child, Simone Beck and Louisette Bertholle. I had just returned from a year in France as a college student and felt passionate about French food. This book, a best-ever gift, battle-worn, stained, and shredded, remains precious to me over half a century later.

First published by Knopf in 1961, Mastering the Art of French Cooking introduced French cuisine to Americans. In the foreword, Julia (and she was the principal author) says this:

"This is a book for the servantless American cook who can be unconcerned on occasion with budgets, waistlines, time schedules, children's meals, the parent-chauffeur-den mother syndrome, or anything else which might interfere with the enjoyment of producing something wonderful to eat."

For many Americans, French cooking was perceived to be overly rich, heavy, too fancy and full of weird things (like a lot of liver). Julia's book explained that a typical French menu was composed of several courses. People didn't have three helpings of mashed potatoes or a two-pound steak. They ate smaller quantities with plenty of variety.

Over time, as cooking shows proliferated and a quick internet search delivered any recipe, cookbooks in general have become passé. While Mastering the Art of French Cooking  has sold over 1.5 million copies, it's hard to imagine most people taking the time to read and study it now. But Julia Child herself continues to play a large part—through television shows and series—in American popular culture.

The meals prepared by the French family I lived with in 1968 were typical: very small breakfasts (bread and coffee), lunch with several courses including cheese and dessert, and a light dinner (often soup, bread and salad). Children had gouter or a snack, often  an éclair or a pain au chocolat after school, but otherwise there was no snacking. The main meal varied between lunch and dinner depending on work and school schedules but a full Sunday lunch was customary and often included grandparents.

One funny memory: In my French family's house, there was always a large saucepan simmering on the back of the stove which contained various scraps and bones. When I asked, I was told "C'est la soupe du chien." It was the dog's soup and that is what the dog was fed. Nothing was wasted.

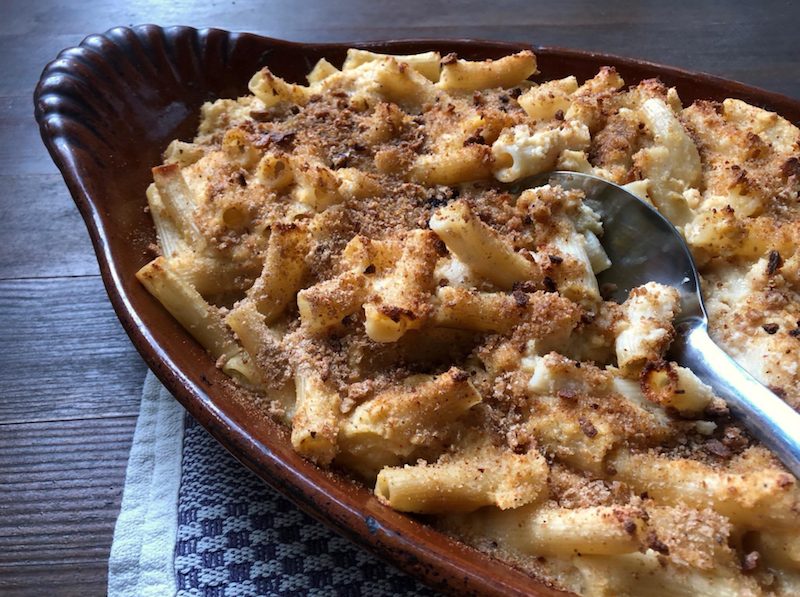
Reading Mastering the Art requires patience and plenty of time. There are no shortcuts and the recipes are followed by copious recommendations for accompaniments. As an example, the chapter on leg of lamb is fifteen pages long and has seven suggestions for traditional vegetable garnitures: Bruxelloise, Châtelaine, Clamart, Florian, Judic, Provençale and Viroflay. Artichoke hearts, Brussels sprouts, braised lettuce, stuffed mushrooms,  or whole baked tomatoes were just some of these and each garniture referenced specific recipes and their page numbers.

I made the roast leg of lamb on March 28th, 1969, according to my note in the margin along with the following comment: "Cook a bit longer than it says—unless it is really room temp when put in oven."

My enthusiasm for this cookbook and my dedication to learning the techniques hit a big snag, however. I was unprepared for the omelette. 

This is the cheery introduction to the eleven pages of treatise and recipes in the omelette chapter:

"A good French omelette is a smooth, gently swelling golden oval that is tender and creamy inside. And as it takes less than half a minute to make, it is ideal for a quick meal."

Less than half a minute? Between wrestling with my pan, its handle, the shaking, the lifting and finally slapping an egg mixture that was neither smooth nor gently swollen onto a plate, my omelette was a disaster. 

I tried more than once and while I should have taken to heart her cautionary advice—"…before you even start to make one you must read, remember, and visualize the directions from beginning to end, and practice the movements"—I ended up frustrated and seething.

Then I remembered: Julia lived in Cambridge! Right across the river! I raced to the telephone book (yes, children, that's what we had in those days) and sure enough, there was a listing. I telephoned and Paul Child answered. Julia was away for the afternoon but perhaps he could help.

"Less than half a minute to make an omelette?" I sputtered. "It's impossible."

"Now, now," he said gently. "It's patience. That's all you need."

"Really?" I was unconvinced."Yes," Paul said firmly, "Keep making omelettes and you'll be making them in less than 30 seconds." 

Patience won out. And I learned it's not a clock race, it's producing that gently swollen, tender and creamy eggy marvel. 

Thank you, Paul Child.


Get a copy of Mary's Throw a Great Party that recounts menus and recipes from those fabulous Sunday dinners in Paris with Jim Haynes.

Photo by Mary Bartlett of her well-loved copy of Julia's classic Mastering the Art of French Cooking.

Guest Essay: Ode to a Strainer

My friend Hank Shaw, a Northern California writer, author and blogger at Hunter Angler Gardener Cook, describes himself this way: "I write. I fish. I dig earth, gather things from the wild, raise plants, live for food and hunt anything that tastes good." Doing that requires a few basic tools, one of which he wrote about recently on his new venture with his partner, journalist and photographer Holly Heyser, a collection of wide-ranging essays called To The Bone.


This simple tool makes my food better almost every day.


I get asked about the secret to my cooking all the time. There are a lot of reasons why my food tastes the way it does, some of them learned from long decades of experience. But there’s one you can pick up tomorrow and vastly improve your own performance in the kitchen: a fine-meshed strainer.

Or better yet, several.

Sieving and straining food elevates the end product by removing lumps, debris, impurities or indigestible bits. And if you don’t think this matters, here’s a case study.

Straining water off freshly made acorn flour.

Years ago, my co-worker Laura decided she wanted to make soup for her family. I can’t remember if it was based on one of my recipes or not, but regardless, she’s not a hunter so it was store-bought products.

She liked the soup, but her family did not, derisively calling it “debris soup” because in the bottoms of their bowls lurked a witch’s brew of bone bits, clotted blood, stem fragments and other things too horrible to mention. The broth tasted chalky and sour to them.

Turns out Laura never strained her broth. What went into the pot stayed there, and while this is often perfectly fine, it sure isn’t when you want to make a broth that then becomes a soup.

Another case: Years ago, when I learned how to make a proper salsa, and I am talking a smooth Mexican salsa, not pico de gallo, the ladies who taught me made sure I knew to push the blended salsa through a strainer (top photo).

Why? Because if I didn’t, I and everyone else who ate that salsa would pay for it in the morning. Turns out the skins and seeds of chiles are not digestible. (And in fact the seeds of certain chiles need to pass through the digestive tract of animals, notably birds, before they can even germinate!) If you’ve ever had the “ring of fire” in the morning, blame the skins and seeds.

And blame cooks who failed to strain their salsas.

I use my strainers almost every day.

One day I am rendering fat. Straining separates the clean fat from the asiento, the “seat” of fine fatty bits that is so wonderful on a tortilla. That strained fat is purer, and lasts longer because there’s no debris in it to attract mold.

Another day I am making a syrup out of something like chokecherries or prickly pears or gooseberries. If you want the most flavor, you need to initially make these syrups with the whole fruit, pits, seeds and skins and all. But even whizzing it in a fancy Vitamix blender won’t totally remove them from the finished product.

So you need to strain. Otherwise, you get a layer of sediment at the bottom of your syrup, which not only makes it ugly, but makes it taste weird. You don’t want floaters on your pancakes.

Sauces are the same. Running a gravy or a pan sauce through a strainer elevates it, makes it prettier and cleaner-tasting.

Nowhere is this more true than in broths and stocks.

I strain these several times, the last time through a paper towel set inside the strainer. This, plus the fact that I never let a broth boil—boiling will emulsify fat or calcium particles in the liquid, turning the broth cloudy—which results in an almost consommé-like broth without the fancy raft and re-cook.

Even where there’s no liquid involved, I love my strainers.

When I grind chiles for pepper powder I use a strainer. Ditto for when I make acorn flour or masa harina or porcini powder.

You may ask which strainers I prefer, and while I have no brand recommendations, I will tell you that they should be sturdy, because you will forcefully push things through them from time to time. And they should be of different sizes. You can always make do with a larger one, but having a large and a small strainer makes life better; many companies make nesting sets of three.

You also want your strainers to have two handles, long on one side, C-shaped on the other. Why? This allows you to set the strainer over a bowl or pot, so you can do your thing. The ancient, one-handled strainers are irritating.

A cheffy chinois is nice, but not totally needed, nor is the even cheffier tamis, which is a drum sieve. I find them hard to clean, and I’ve never had a tamis that I haven’t blown out the bottom of.

Strainers make everything better. We used them many times a day in the restaurants I worked in, and they are an easy way to improve your own cooking at home.

Katherine Deumling: Love Your Leftovers

"Food is beautiful. Food is nourishing and delicious and, yes, complicated.
However, food should be a joy, not elicit fear."

Teaching people to cook delicious food at home has been the life-long mission of Katherine Deumling, and is the driving force behind her business, Cook With What You Have. She has just released the third in her series of e-books, "Love Your Leftovers! Favorite Meals that Save Time, Money & Effort," which expands on her mantra of developing creativity and confidence in the kitchen so that you and your family can enjoy delicious, healthy food on a daily basis.

Author and educator Katherine Deumling.

Katherine spent her early childhood in West Germany, the daughter of a creative, efficient mother with a sprawling vegetable garden whose cooking centered around fresh produce and pantry staples, which became the inspiration for Katherine's own cook-with-you-have ethic. A post-college fellowship gave her the opportunity to travel to Italy and Mexico to study how and why people cook the way they do, then a decade of work with Slow Food—including a stint as Chair of Slow Food USA—expanded her awareness of food systems and regenerative agriculture, and gave her an enduring passion for the combination of pleasure and politics.

Her love of leftovers was born out of both necessity—her husband likes to take his lunch to work and she's the busy mother of a teenage son—as well as frugality. She figures that by using leftovers her family saves more than $1,500 per year by not buying lunches, plus minimizing food waste by using or repurposing perfectly good (and delicious) food. Then there's the time and effort saved by having lunches packed and ready to go the night before.

Cauliflower mac'n'cheese.

"Love Your Leftovers" continues Deumling's quest to give people what she terms "agency" in the kitchen, that is, to feel creative and effective when it comes to making food. The 17 dishes in the book, 13 of which are plant-based, are designed to boost cooks' personal satisfaction and to short-circuit what she calls "the tyranny of the recipe-based structure." If a recipe calls for a half-teaspoon of thyme, she said, some people give up because they don't want to make a trip to the store instead of simply leaving it out or trying another herb.

"Even smart people shut down in the kitchen," she said, because they've never been given permission to be creative and develop their own tastes rather than slavishly following the dictates of a recipe. Or as Deumling said, her aim is to encourage people "to beat the system" by making deliciousness part of their daily lives.

Cauliflower Mac'n'Cheese

Vegetables can make for great comfort food! This makes a lot and is even better the next day, heated up in a skillet with just a splash of olive oil on high heat. It develops a crust and is sublime!

2 Tbsp. olive oil
1 medium cauliflower, stems & florets chopped (about 8 cups)
1 lb. pasta (penne, rigatoni, rotini, corkscrew)
1 1/2-2 c. grated cheese (sharp cheddar, gruyere)
1 Tbsp. Dijon-style mustard
2 Tbsp. olive oil
1/2 tsp. chili flakes
1/4 tsp. grated nutmeg
Black pepper
1 3/4-2 c. hot pasta/cauliflower cooking water
1/2 c. bread crumbs

Preheat oven to 400°.

Bring a large pot of water to boil and add salt. Cook the cauliflower in the boiling water until very tender, about 15 minutes. Scoop the cauliflower out of the water with a slotted spoon and transfer to a food processor or blender. Add the pasta to the boiling water and cook until just al dente. Scoop out 2 cups of hot, starchy cooking water and then drain the pasta and put it in a 9" by 13" baking dish or other similar baking dish.

Carefully process the cauliflower with the 1 3/4 cups of cooking water, olive oil, cheddar, mustard, chili flakes, nutmeg and pepper. (You may have to work in batches.) If the sauce seems too thick, add the remaining liquid or a bit more water—it will thicken when baking. Taste and adjust seasoning. You want it to be quite strongly flavored. Pour the sauce over the pasta, toss, and spread mixture evenly in dish. (You can make the dish to this point, cover, and refrigerate for up to a day.) Sprinkle the top with breadcrumbs or additional grated cheese. Bake until the pasta is bubbling and the crumbs are browned, about 20 minutes if all your components were hot, 30 minutes if not. Pass under broiler for more browning if you’d like.

Serves 6

Photos by Shawn Linehan from "Love Your Leftovers."